Happy Monday, ManMakers! Today, I’m super excited to share an exclusive project with you. It’s an excerpt from the new book Build Stuff with Wood, which is all about making cool woodworking projects with the most basic of tools.
The book is written by Asa Christiana, the former editor of Fine Woodworking magazine, and, I’m proud to say, a close friend of mine and all-around good guy. It features a variety of everyday objects you can make armed only with a cordless drill, a circular saw, and a jigsaw, plus a small palm router on one or two. There’s a section on setting up a workspace, building a basic tool kit, and how to get great furniture-quality results from construction-grade tools. (Plus, a nice section on shop safety featuring a few photos of yours truly.) Plus, the intro is written by Nick Offerman, so…enough said!
Asa is sharing a complete project from the book: this cool passive speaker that amplifies your phone’s audio without any electricity. It’s cool, it works, and looks great. So! Follow along with the tutorial below, check out the book, and keep building stuff!
The science behind a passive speaker is simple. If you’ve ever stuck your phone in the bottom of a cup or glass to hear the music better, you know how it works: The sound bounces around the bottom, expanding and growing as it moves up and out. Store-bought versions are more sophisticated but work on the same principle.
As soon as someone discovered the glass trick, DIYers started making their own passive speakers, often from wood. These range from not so great looking to nice but not so easy to build, so I went searching for the sweet spot between. The solution was layers.
A sound sandwich
A passive speaker has three jobs: It needs to hold your device, direct its sound down a small channel, and send it into a big opening that broadcasts outward. So how to work with the tools in this book and create those three openings, with one of then being completely hidden?
On one of my many trips to the home center, I found something called “project boards,” available in various thicknesses. These let me visualize a sandwich, with a thicker back and front, and a thin layer in the middle that could both hold the phone and create the small channel.
With the right sequence of cutting and gluing, I would end up with all the nooks and crannies I needed.
The “project boards” also came in a convenient 5-1/2-in. width, perfect for this project. The only downside is limited wood selection. I had to choose between red oak and poplar (I chose the latter). But if you have a friend with a thickness planer, you could use any wood you like for your three layers.
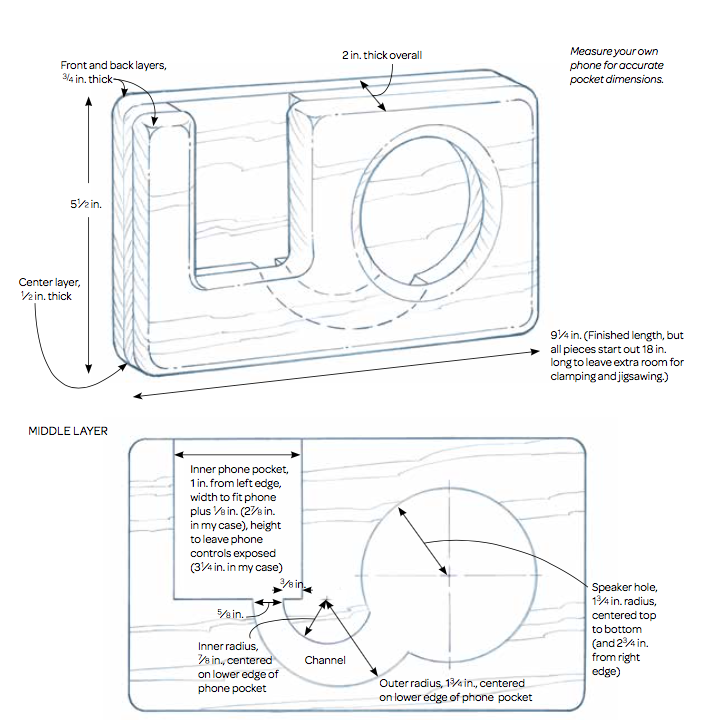
This compact block, inspired by old-time radios, will hold your phone and amplify its sound, without a power cord in sight. You can customize it to fit almost any device, including a tablet. The layered design lets you divide and conquer the construction.
1. Lay out the middle layer
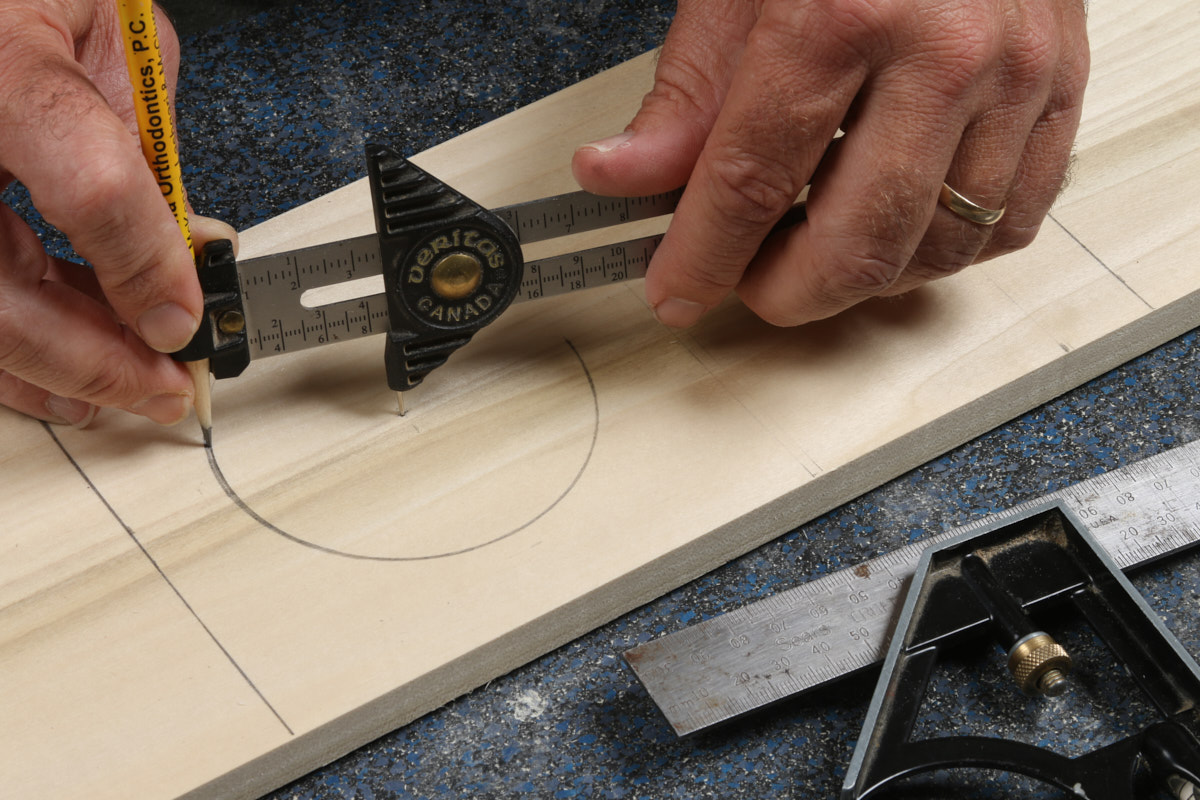
All of the layers start out 18 in. long. The project gets chopped to final length only after the layers are glued together. Start by laying out the middle layer, which is the thinnest. After laying out the ends of the final block, find the center of the speaker hole, set your compass, and pencil in the big circle.
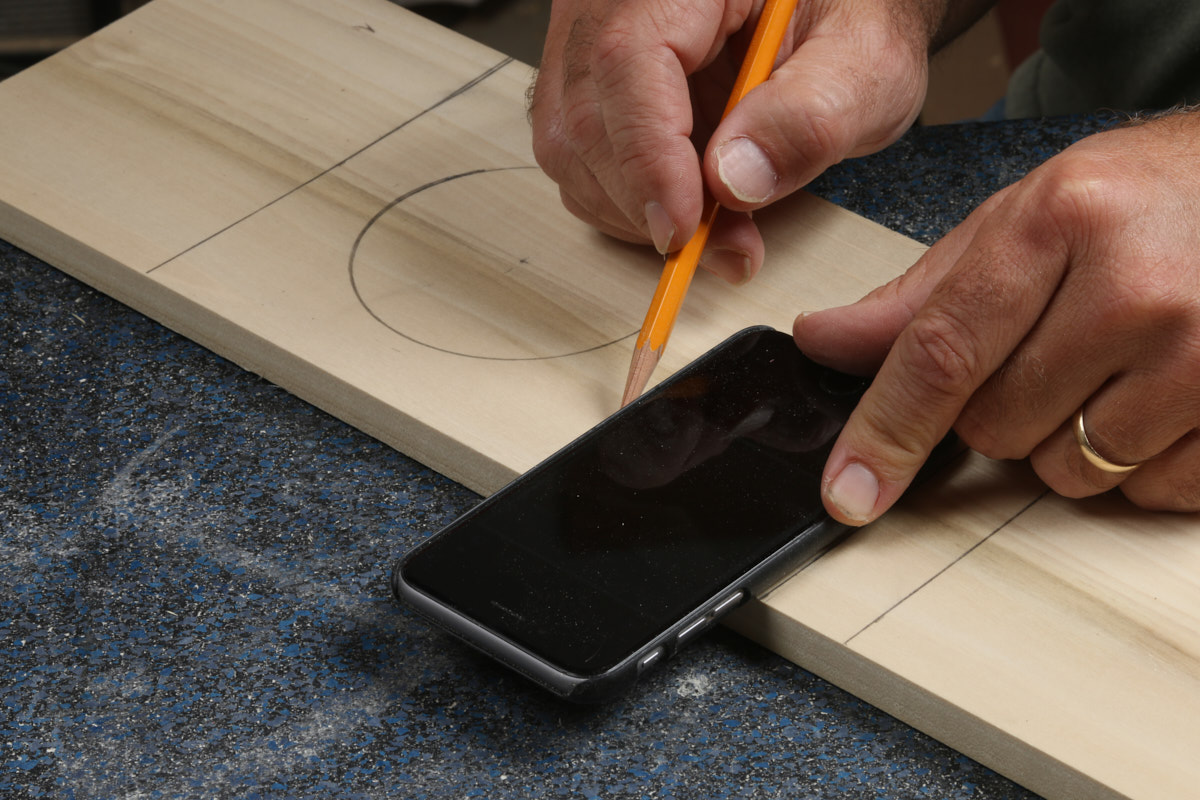
Draw a line 1 in. away from the edge and set the phone there, ensuring it is square to the block. Move it up until the volume controls are above the top edge and accessible (LOC). Then trace around the phone (LOC). After tracing, add 1/16 in. or so on each side so the phone will slide in easily.
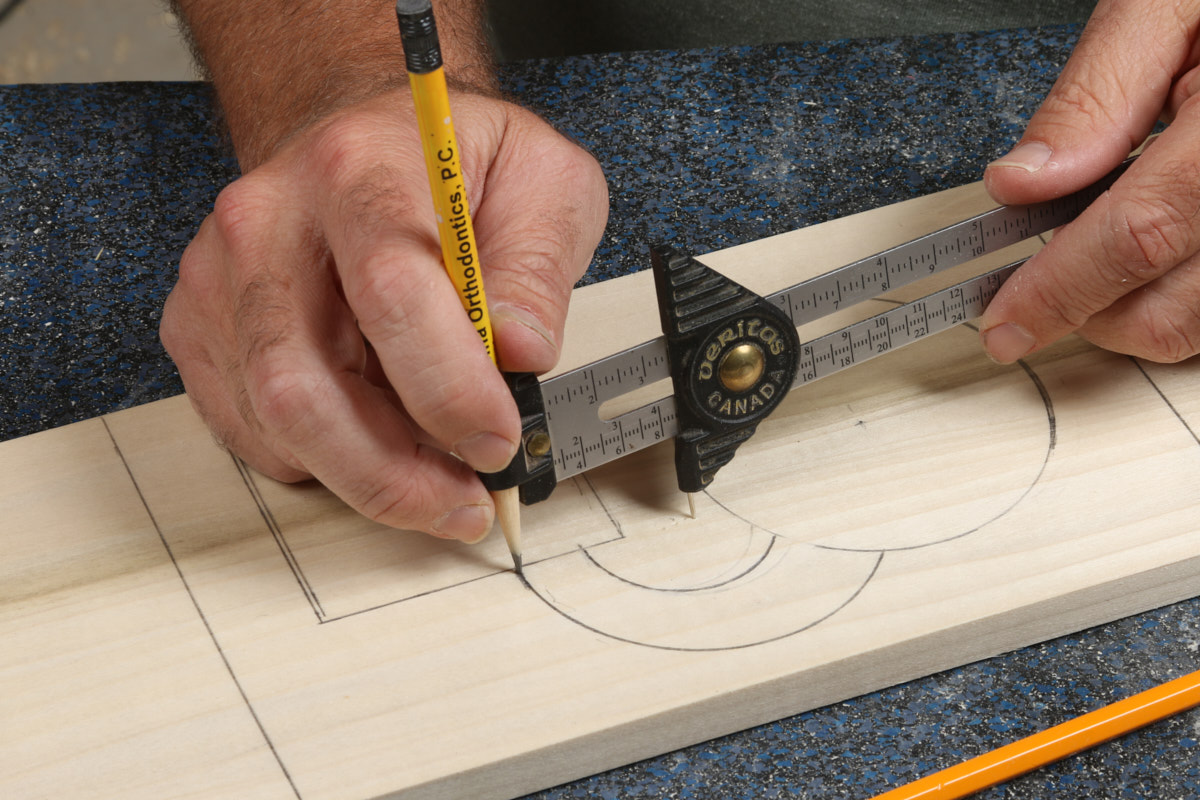
Now, lay out the channel. Mark the edges of the speaker, sliding the phone side to side in its pocket to make sure none of the speaker holes will be covered. Then draw the two different arcs that create the channel.
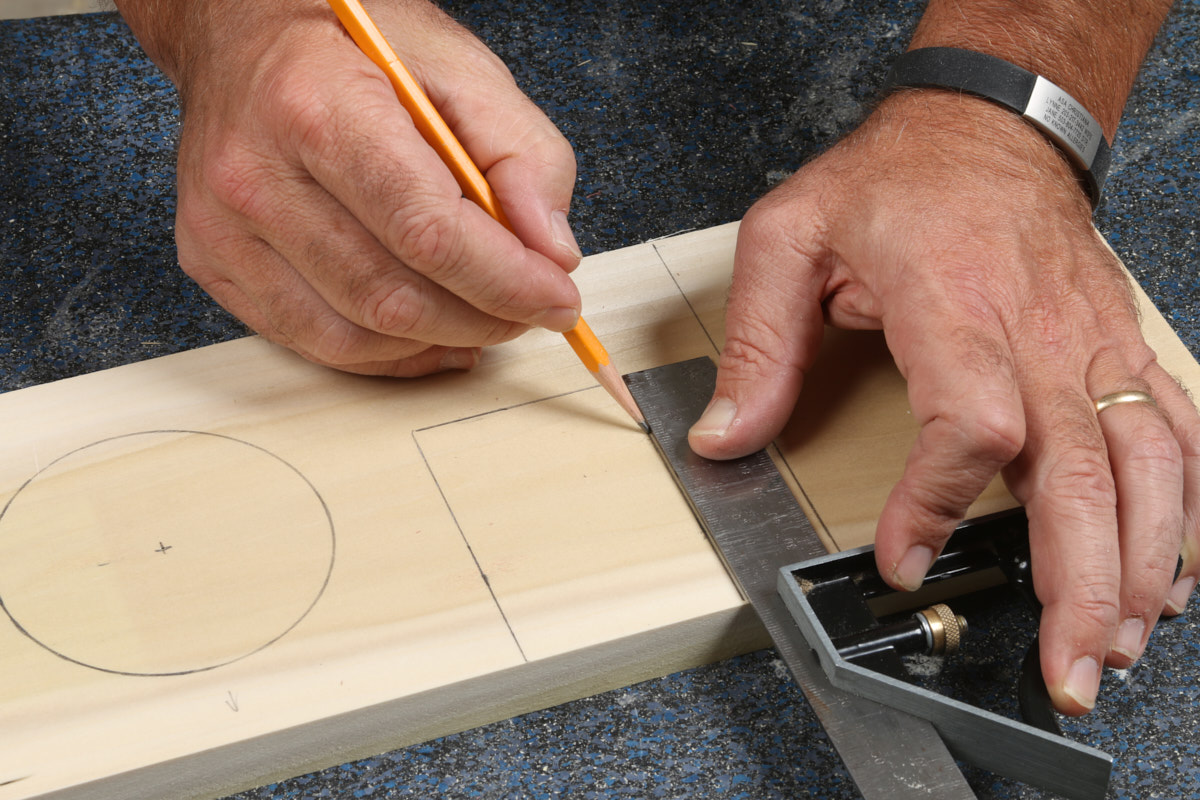
Lay out the top layer
Use the middle layer to help lay out the top one, which is a thicker 3/4 in. After laying out the end lines, make this speaker hole the same as the last one. Use the pocket in the middle layer to lay out this one, moving the lines in by 1/4 in. on the sides (LOC). Use the square to finish the layout, remembering to leave the bottom of the pocket shorter too (LOC), and draw a roughly 1/4-in. radius at each bottom corner.
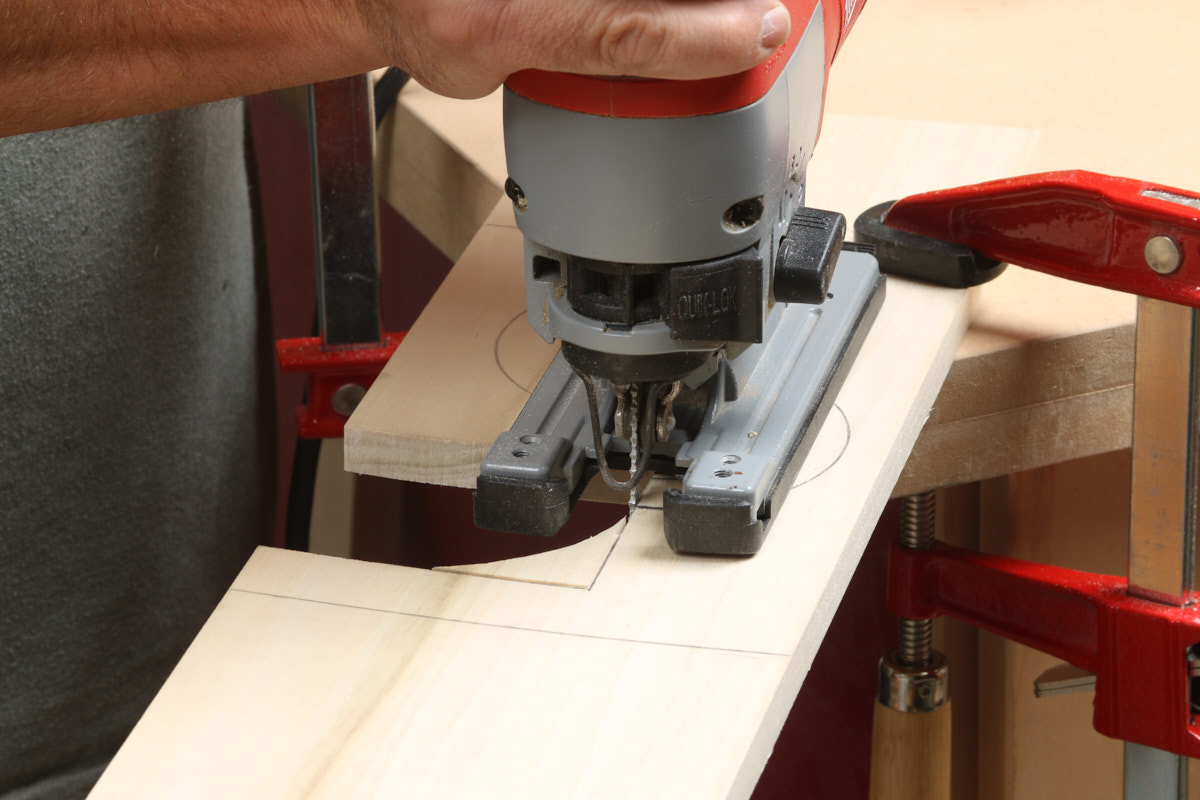
Cut the middle layer
This layer needs its pocket and channel cut out. Save the speaker hole for later.
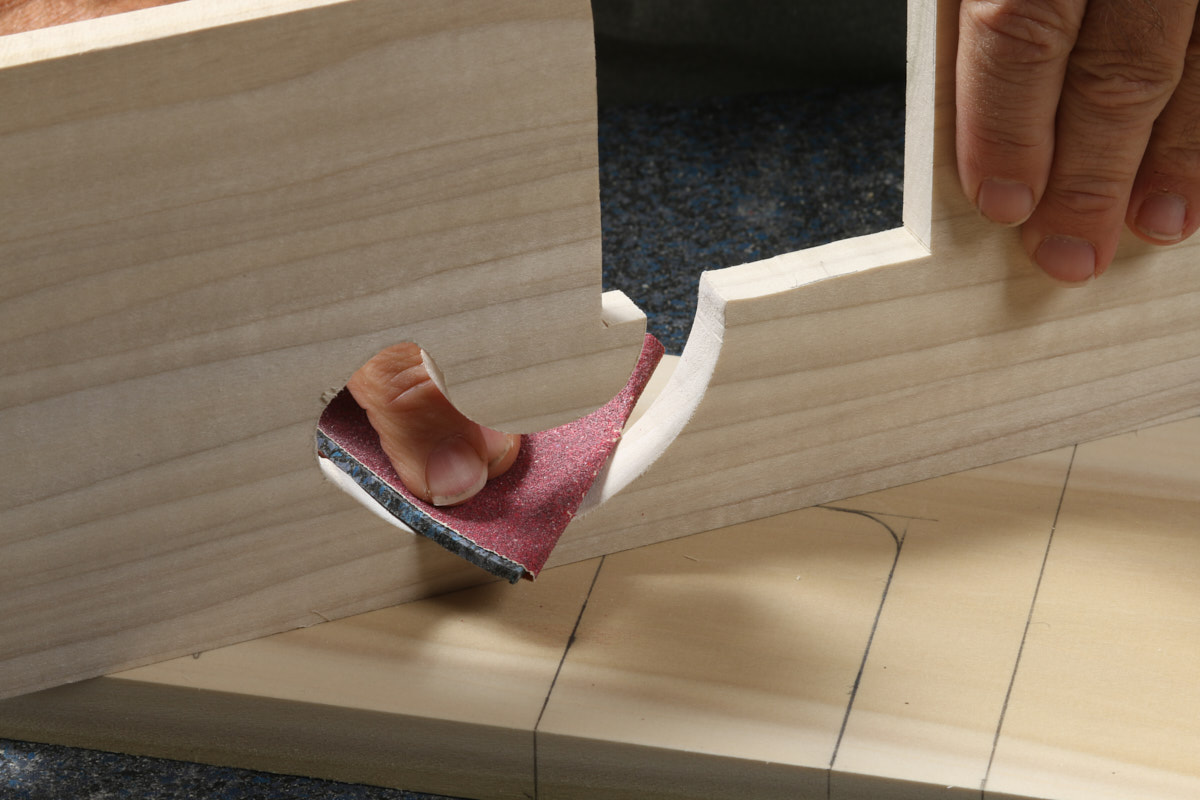
Sand it smooth. Use 120-grit paper to remove the saw marks in the channel, creating a smooth path for the sound. A piece of a rubber mat makes a good backer for smoother sanding.
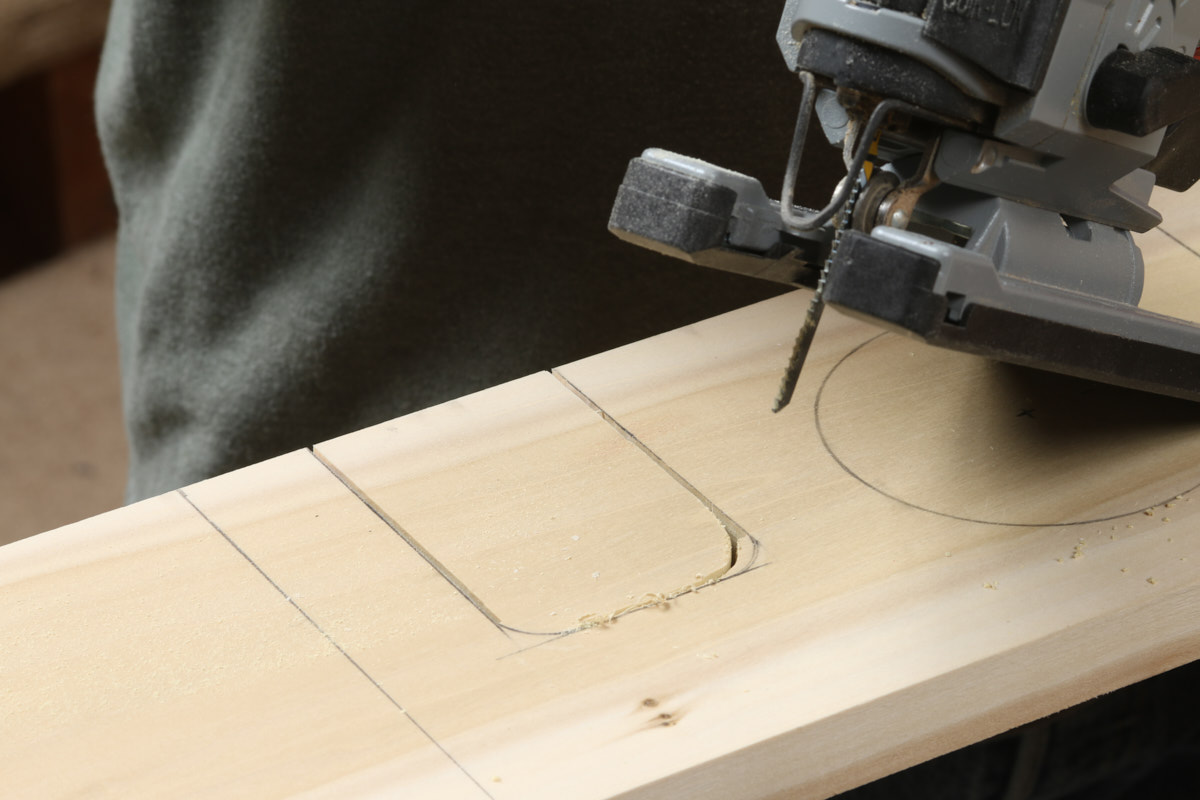
Cut the pocket in the top layer
This will also get a big speaker hole, but only after being glued to the middle layer.
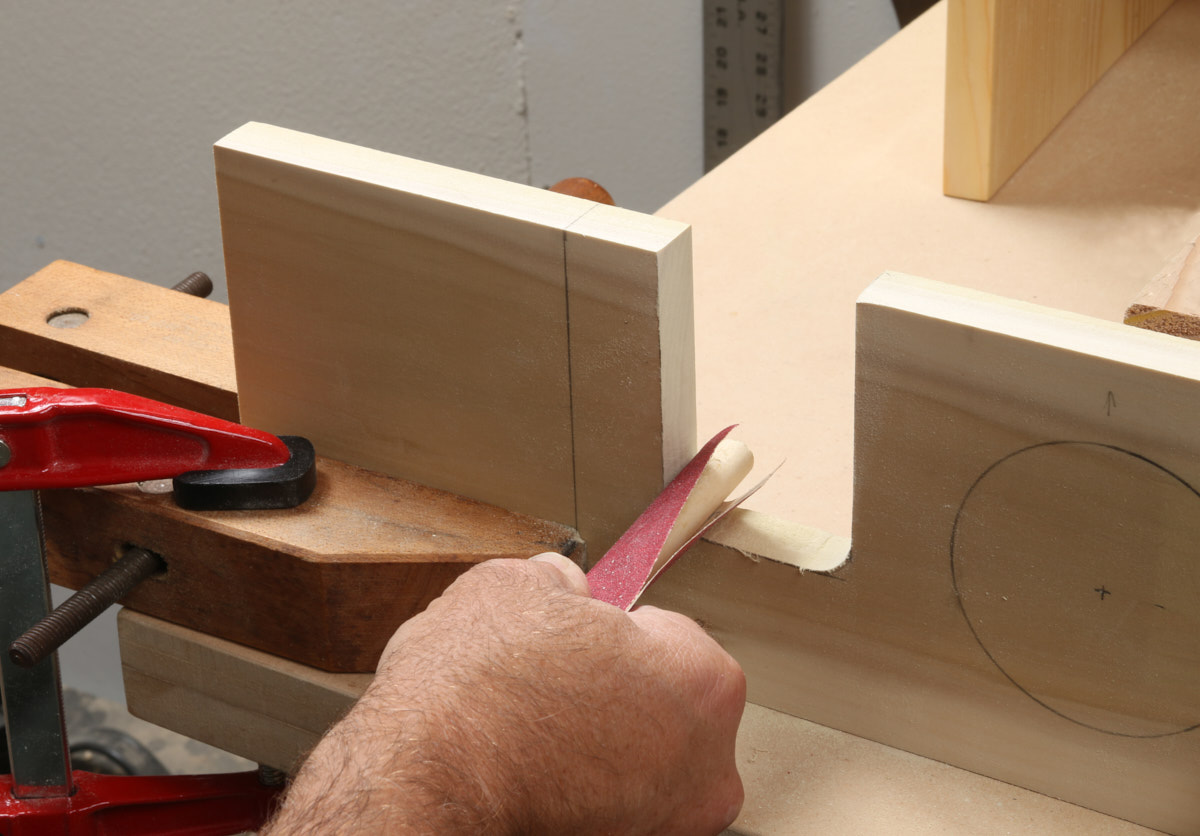
Sand the sides. Start with 120-grit paper and work up to 150 grit. Sand the sides with your normal block. Then, sand the bottom. It helps to clamp the board on edge Use a 1/2-in. dowel to form smooth curves at the bottom edges and then a narrow block to flatten the bottom edge.
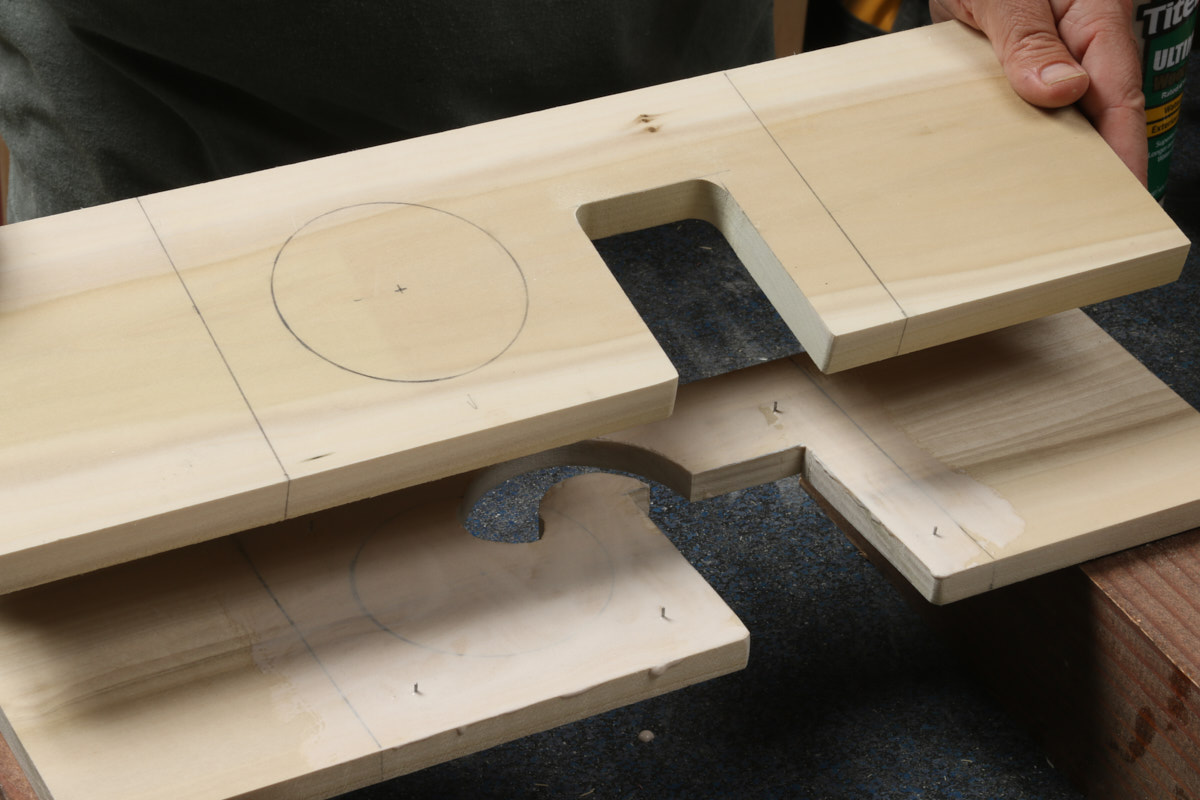
Laminate two layers
Lamination is the technical word for gluing wide things together, like the top and middle layers of this project.I use little 1/2-in.-long brads to keep the layers from sliding out of alignment as they are glued and clamped. Drive in the brads, keeping them away from future saw cuts. And then clip off their heads, leaving a short, sharp point sticking up.
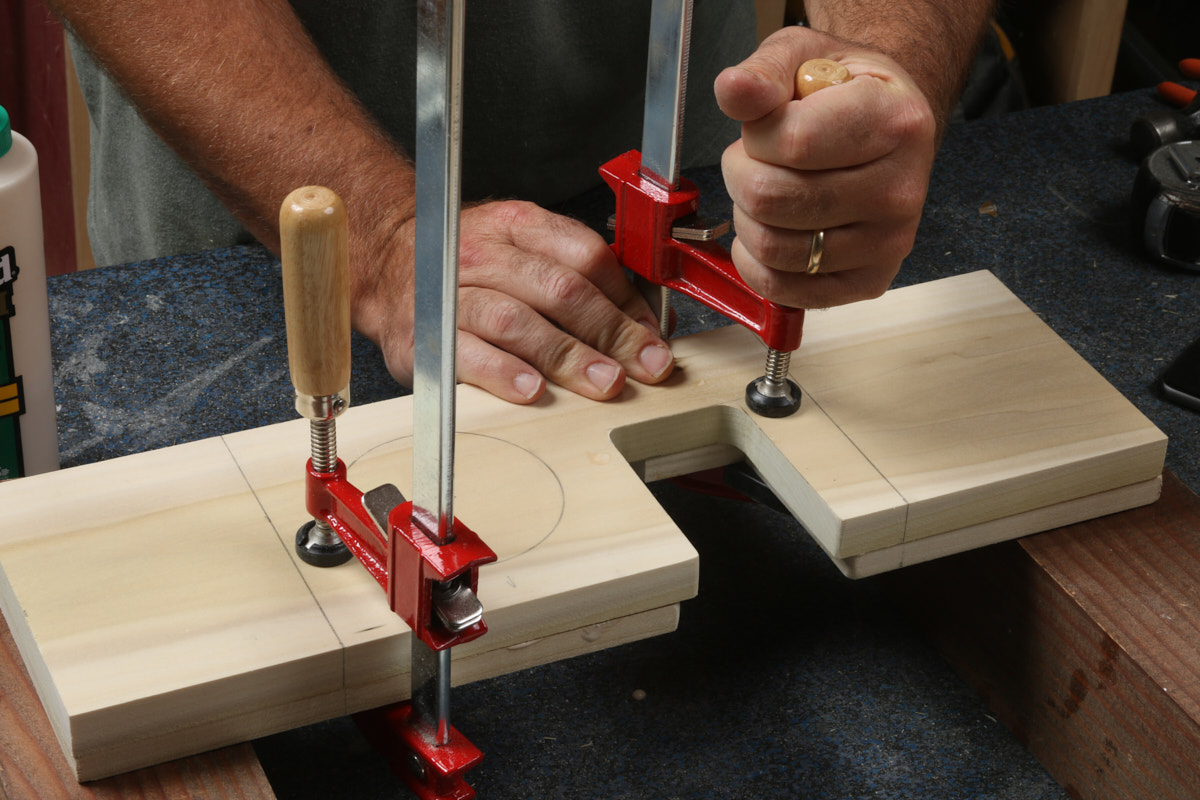
0714: Careful gluing. Put on plenty of glue, but keep it light near the edges of the pocket and channel, so you don’t get a lot of squeezeout that needs to be fussed with after the fact. Use a brush to spread it. Bring the top layer down on the middle one, using your fingertips to make sure they are aligned. Check the pencil lines for side-to-side alignment too. Use a couple of clamps to press the layers together, making sure they stay aligned. The tiny brads will let you make slight shifts. Then put clamps everywhere you can fit them to make sure there are no gaps between the layers. But don’t bother clamping outside the end lines.
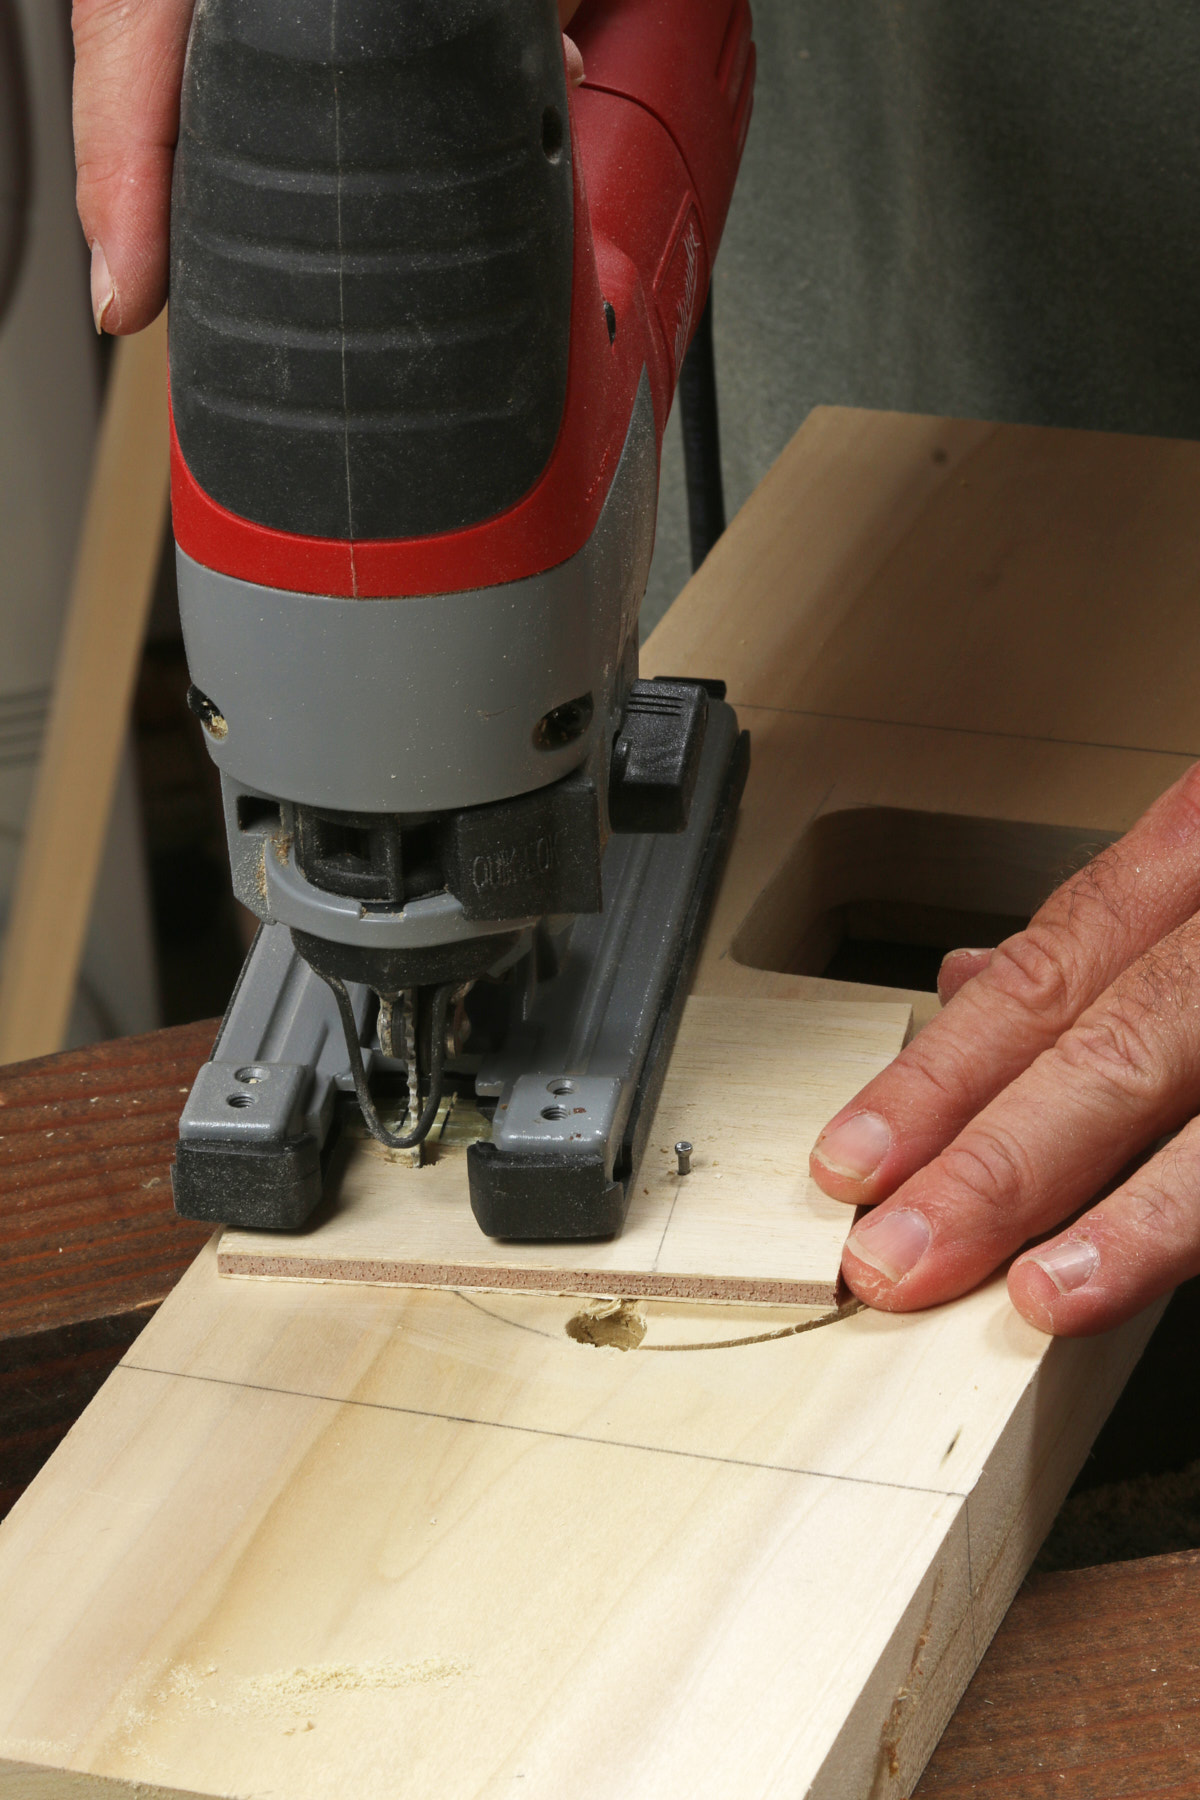
Cut the speaker holes
I used a 1/2-in. drill here to make a big hole for the jigsaw blade. You’ll need to overlap the layout line at the edge in order to get the blade into position to cut, but try to minimize that overlap, as it will show at the edge of the finished speaker hole.
[To make a perfect circle for the speaker hole, you can craft a simple jig to guide you.] You need a small piece of thin plywood, a tight-fitting nail hole in both the plywood and center of the circle, and a hole where the blade will drop in, in this case 1-3/4 in. from the nail hole. I drew some extra guidelines to help me here. Then I attached double-stick tape to the jigsaw base.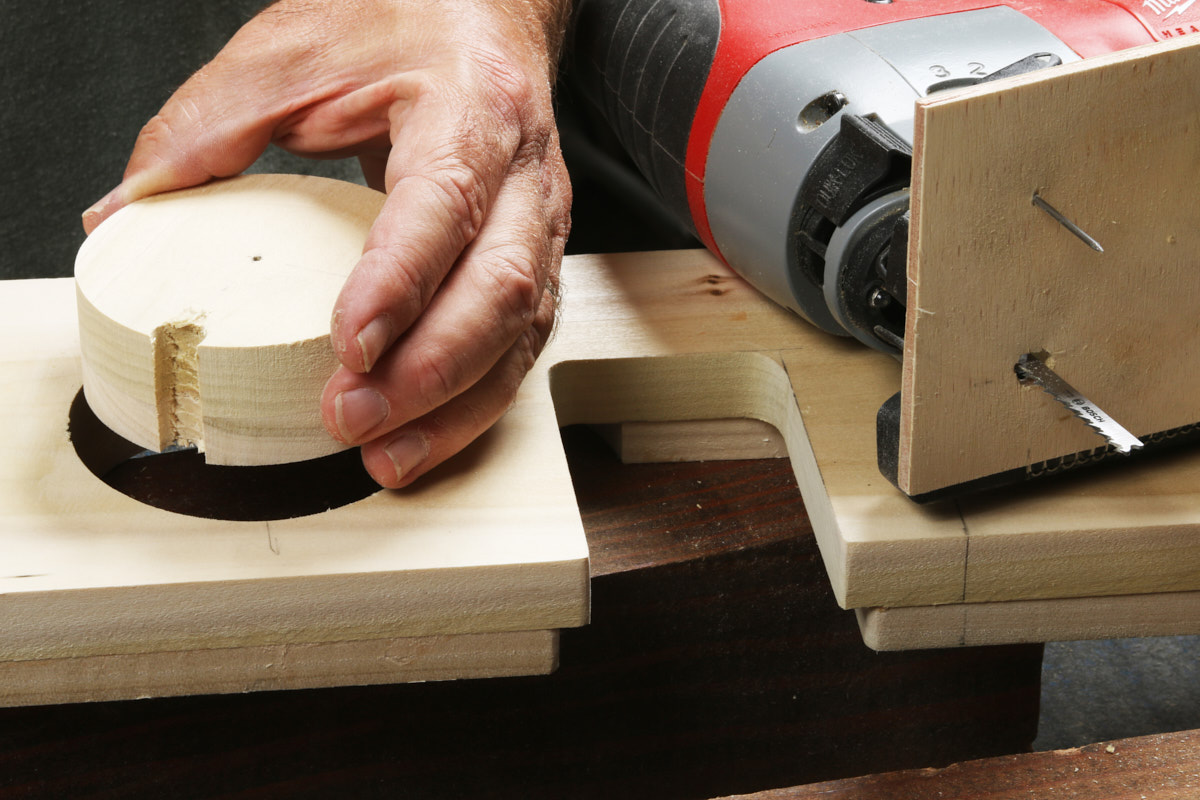
Line up the jigsaw on the little plywood piece, square to the edge, with the blade passing through it. Then hit the trigger and let the jigsaw work its way around the circle. If you notice the blade starting to flex left or right, the tape will let you steer the saw a little bit to correct its course. Pull the saw away when you are done, remove the big wood plug from the center nail, and admire your work.
Finish off the block
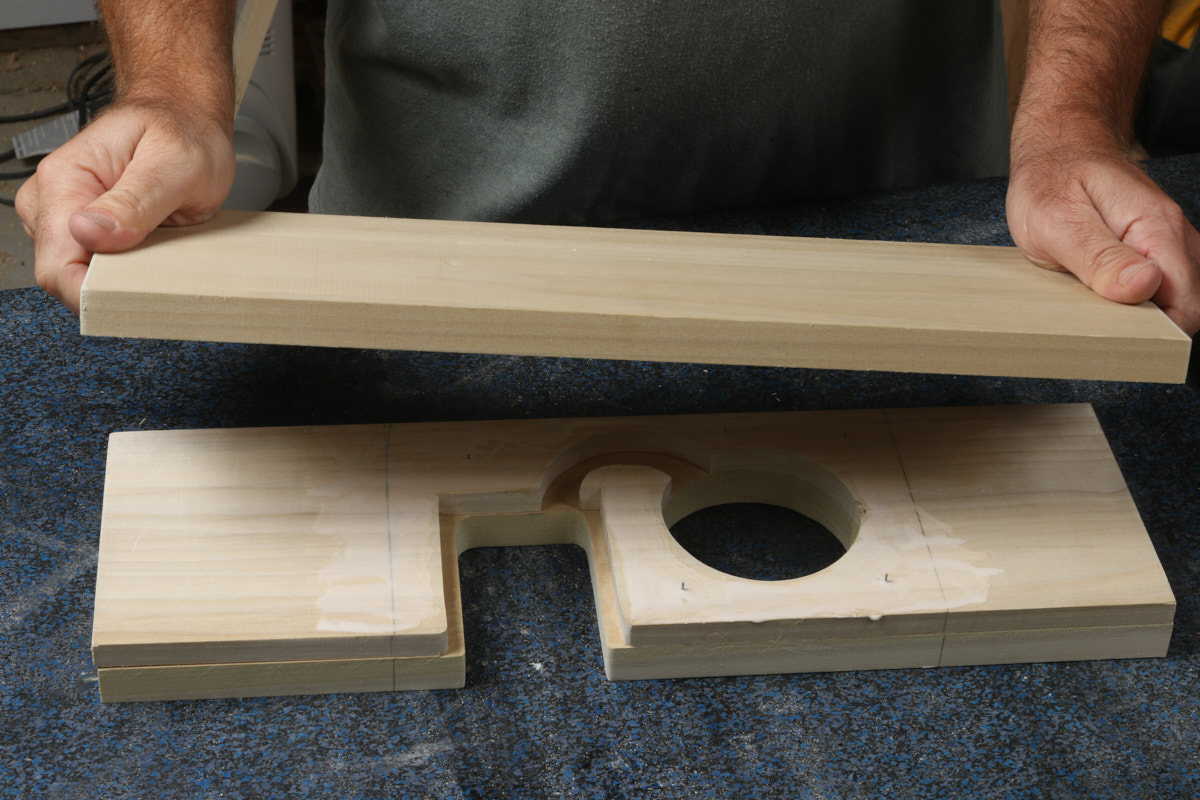
The back layer is just a blank slab of 3/4-in.-thick wood. Once it’s on, you can chop the block to size. Use more clipped brads, and once again keep the glue away from the inside corners where squeezeout will be hard to remove.
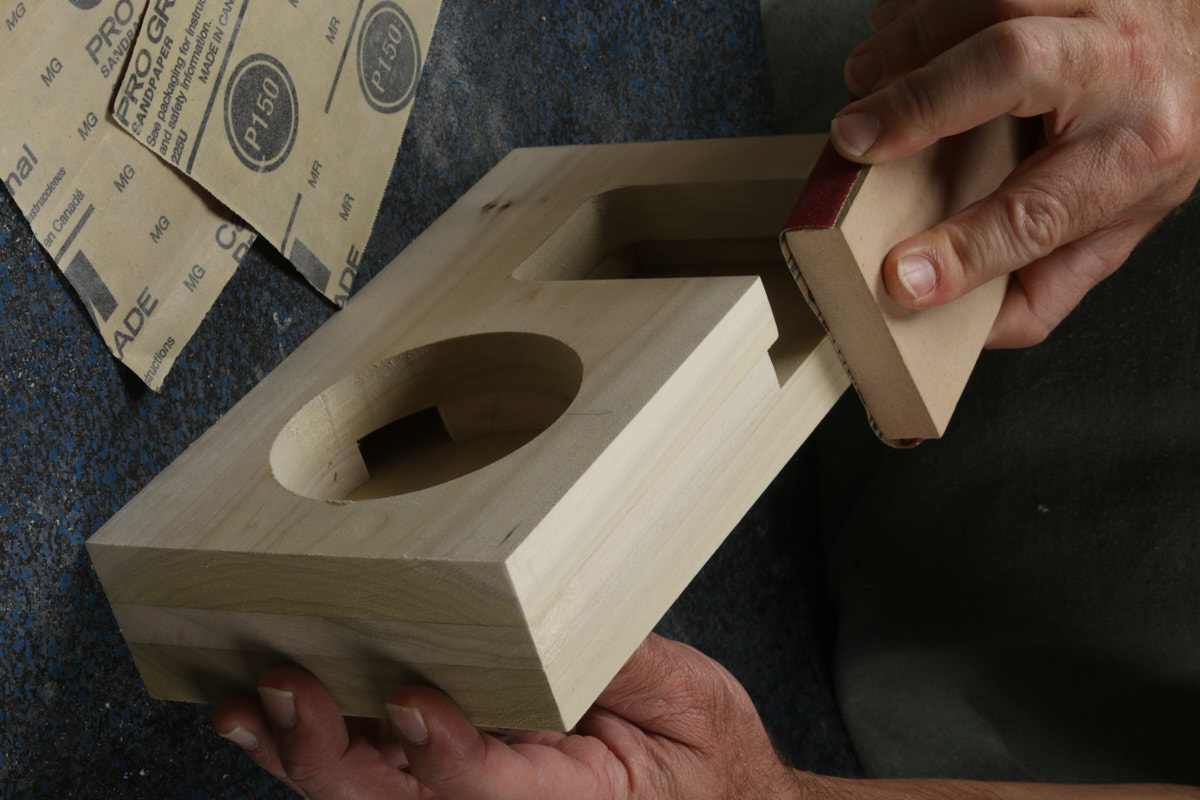
After waiting an hour or two, saw off the block at your layout lines, scrape away any glue squeezeout, and rough-sand the edges flat. The speaker will work great right now (give it a spin!), but let’s make it look even better.
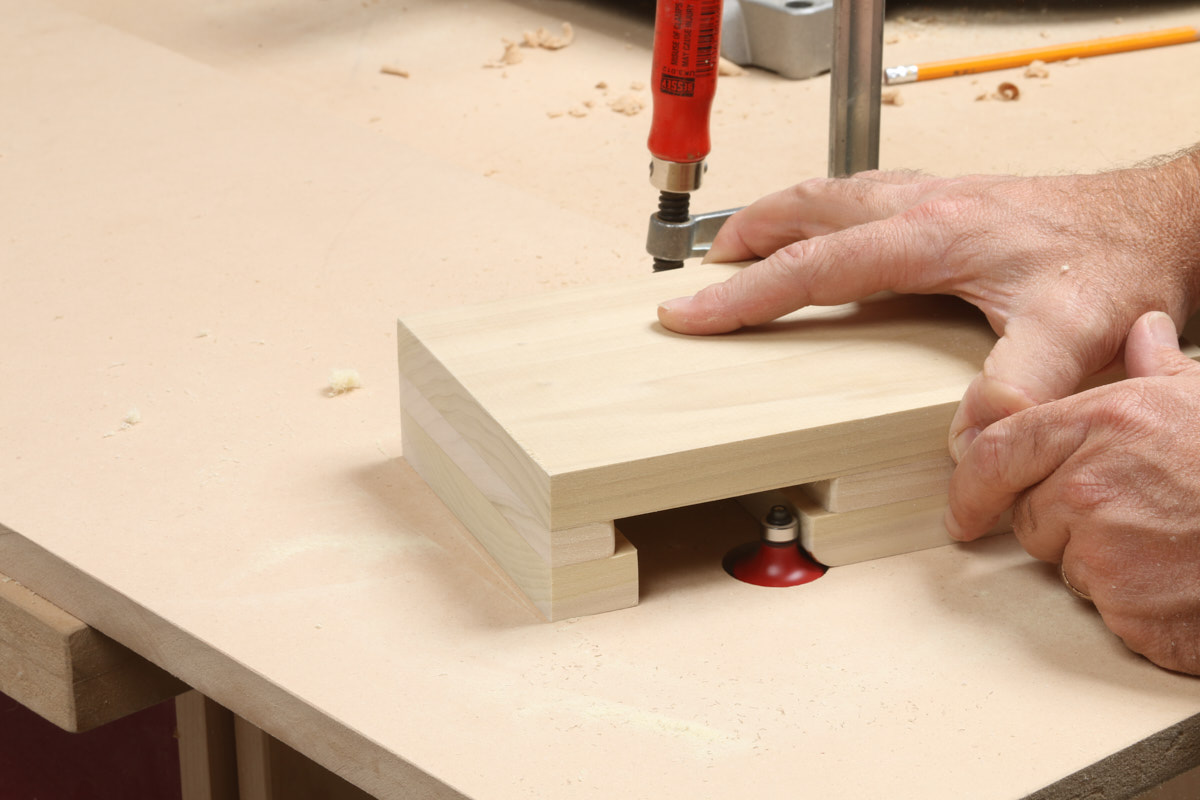
Roundover the edges. This simple router table is nothing more than a piece of MDF, clamped to your workstation. We’ll start by rounding the edges of the speaker hole.
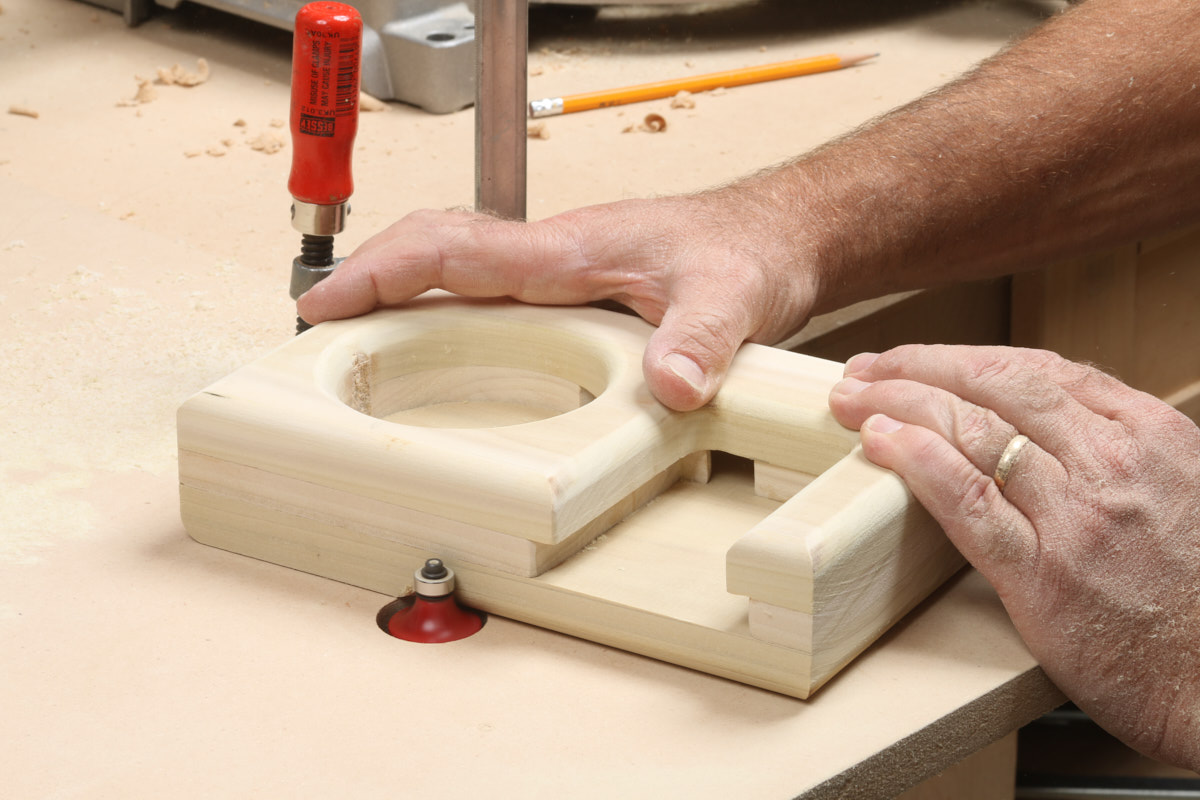
Start with the big hole. Drop the hole down over the spinning bit, without touching it, and then move the block until you feel the bearing riding the edge of the hole. Start moving the block right away, in a clockwise direction, against the rotation of the bit. Keep it moving steadily until you have gone around the circle a couple of times, and you should get a nice clean result.
Then, move onto the phone pocket. Start on the right side of the pocket, as shown. Press steadily against the bearing as you run the bit down one edge, along the bottom, and back out the other side. Keep the block moving steadily and you’ll minimize the burn marks.
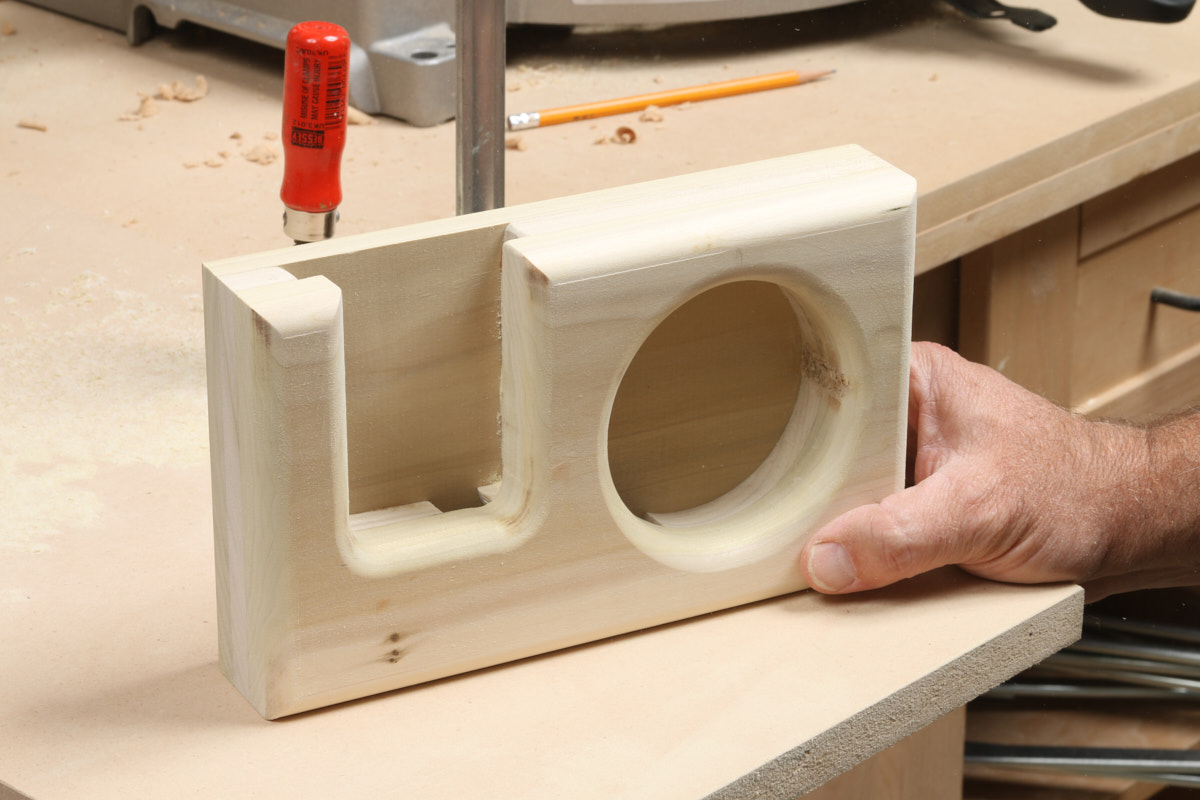
Done in minutes. After rounding the edges, the sleek look is complete.
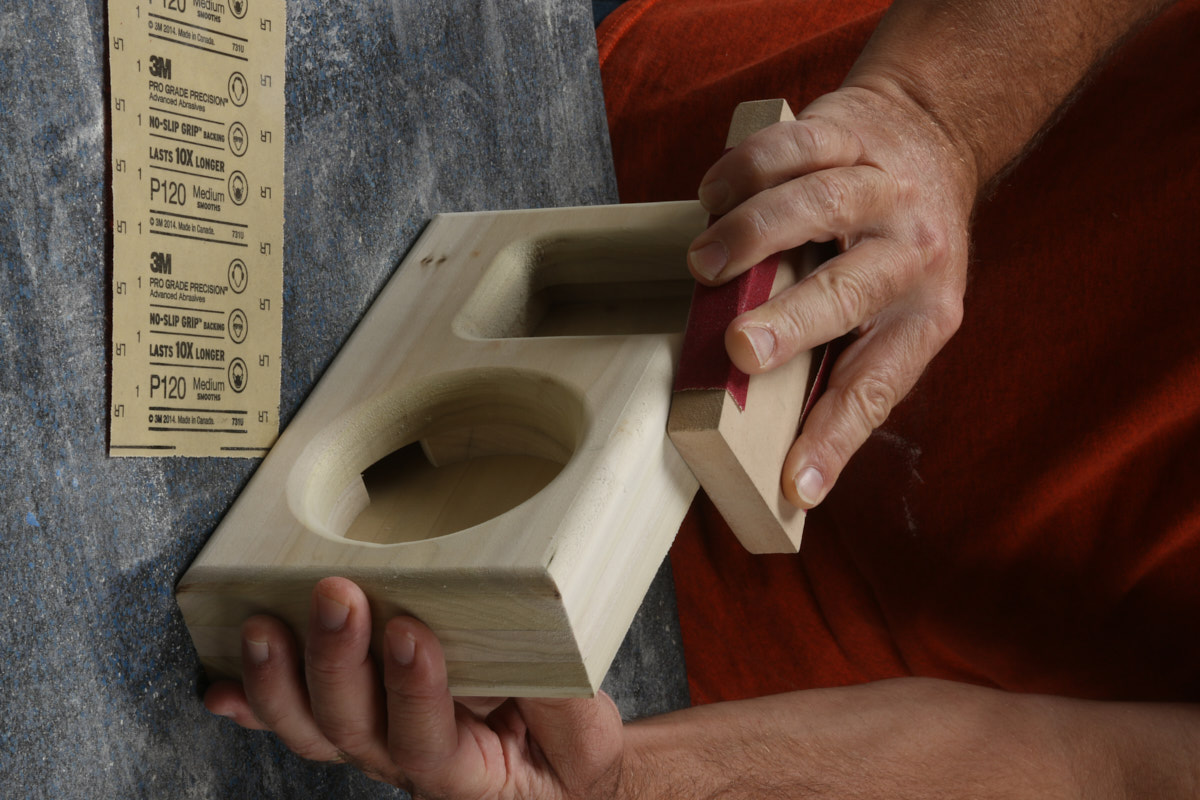
Finishing touches
This project is small and the finish is just a few coats of oil, so you’ll be done in no time. Once again the oil finish is Minwax Tung Oil, which is easy to apply and brings the beauty out of the wood.
Use a sanding block to do the flat areas, working up through the grits from 120 to 220 (LOC). On the roundovers, a flexible backer is the ticket. The rubber backer works in the tight curves, too, getting rid of the last few burn marks and smoothing all the transitions from round to flat.
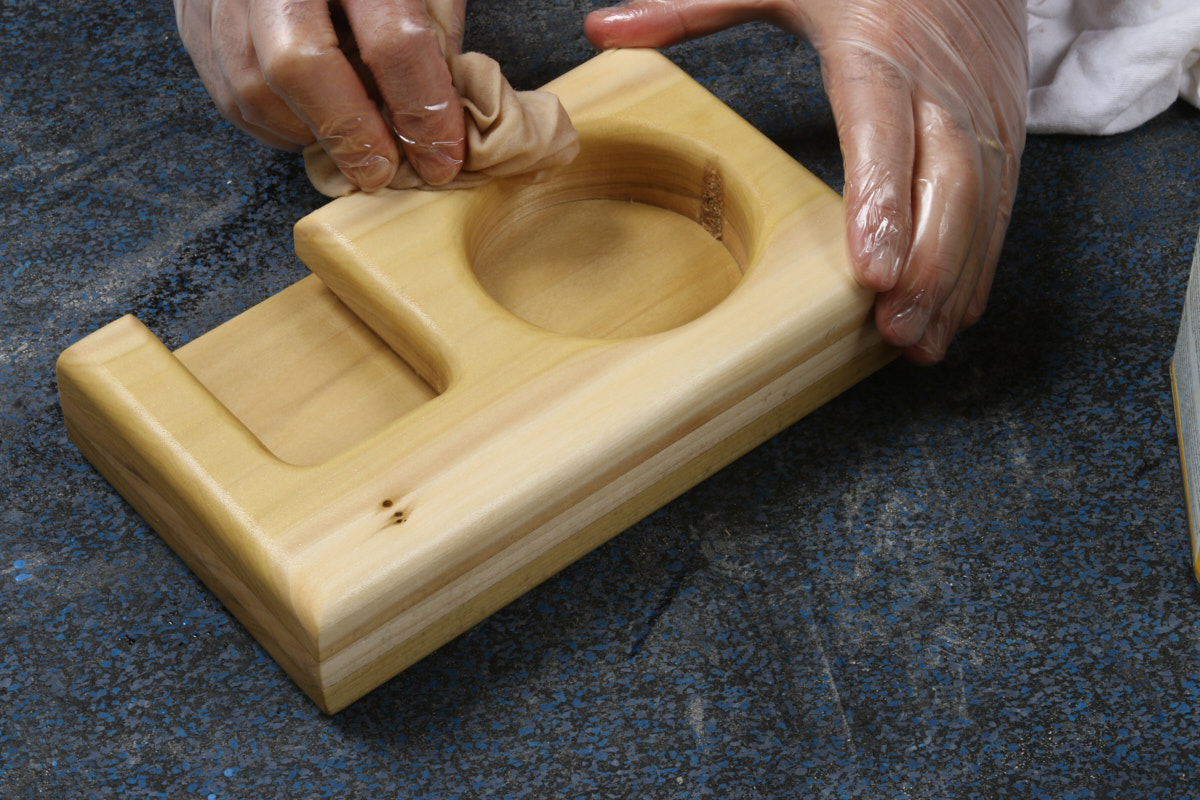
Simple oil finish. Start in the openings, pouring in a small puddle of finish and spreading it into all the tight corners. Then do the flat surfaces, front and back. Wipe off the excess and let each coat dry for a few hours before sanding it lightly with 220-grit paper, folded and held in your hand. Then wipe off the dust and apply the next coat. Repeat until you are happy with the look.
