Time before Christmas is special in every home and we all want to decorate our homes best we can. Some people concentrate on the lights, some on glowing decorations and most people pay special attention to the Christmas tree but every year more and more people are forgetting the tradition of setting up the Christmas nativity scene or Christmas creche in their homes. Just a few decades ago you couldn’t find a home in the holiday season without Christmas nativity scene in their house and sometimes even in the front yard.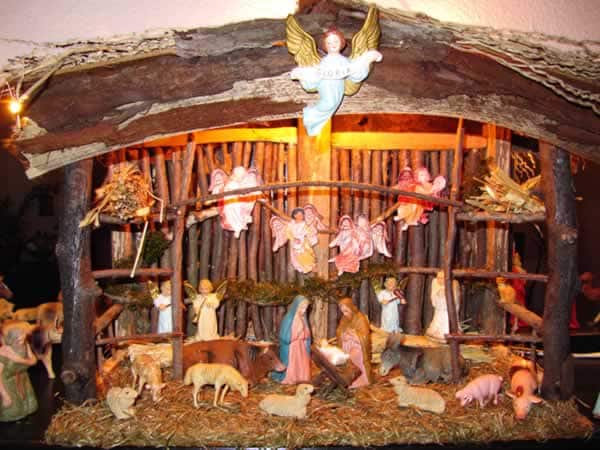
Nowadays that is a rarity, but we think that is an important part of Christmas tradition and we want to encourage you to setup Christmas nativity scene in your home this Christmas.
A little bit of history
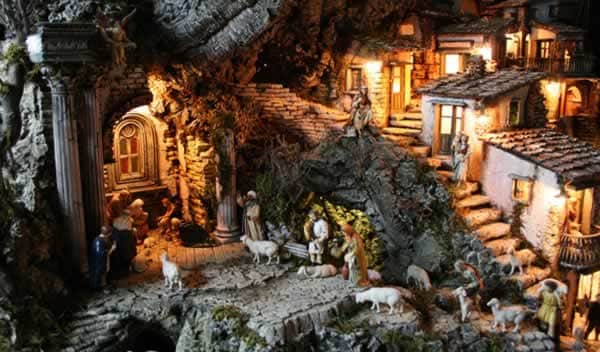
The Christmas nativity scene is also often called Christmas creche from the French word which comes from the Italian word greccio. Greccio was the town where the first manger scene was set up by St. Francis of Assisi in 1223, some say as an alternative for pilgrims wanting to go to Bethlehem, which was then occupied by the Turks. Before that time, many churches had built nativity scenes, but these early mangers were covered with gold, silver, and jewels. They were much fancier than the original manger in which the Christ child was laid. St. Francis wanted people to remember that Jesus was born in a humble stable. He asked a farmer friend of his to help by bringing an ox, a donkey, a manger and some straw to a nearby cave. On Christmas Eve, St. Francis and the people of Greccio met in this cave. By candlelight, they acted out the story of Jesus’ birth. St. Francis hoped that this would encourage people to remember the gift of God to men as the child born in a manger, rather than all the materialistic gifts exchanged. Three hundred years later, Martin Luther had his children open their presents on Christmas Eve, so that Christmas Day itself would be kept special to remember the Christ child.
Guidelines
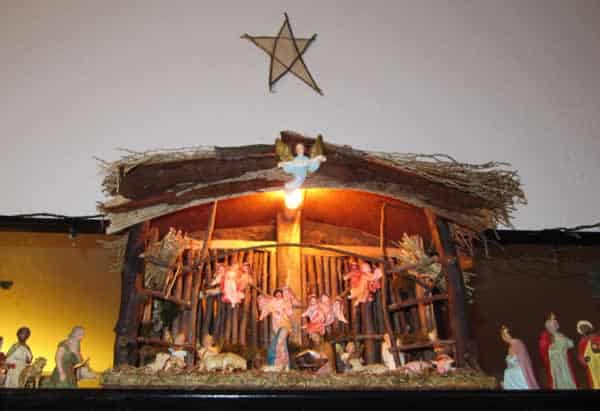
Before you start making your Christmas nativity scene you must learn some basic rules. First keep in mind that fancy and expensive decorations are not an option. Jesus was born in a humble stable in a small village and you must try to represent that in your nativity scene. In the next part of the article we will give you step-by-step instructions on how to construct a stable and a creche and here we will concentrate on what figurines you need and how to arrange them in your nativity scene. Standard nativity set consist of seven figurines but you can always add new figurines and elements after your basic scene is completed. The main character in every nativity scene is baby Jesus Christ and creche must be the centerpiece of every nativity scene. Tradition is to put baby Jesus in the creche in the Christmas morning but most people put all characters at once. The closest figurine to Jesus must be his mother, Virgin Mary. The Virgin Mary must be on one side of the creche and the father, St. Joseph, on the other side. If you have figurines of the three shepherds they must be in the first circle closest to the creche. The magi and kings figurines always come further from the creche than the shepherds because shepherds first visited baby Jesus. Beside those main characters from the Bible, secondary are angels and animals figurines. Angels figurines are mostly place above the creche and they are attached to the roof of the stable. Most common animals which appear in the Christmas nativity scene are sheeps, donkeys, oxes and camel. Donkeys and oxes can go in the stable, behind the Holy family but sheeps must go outside. Also, camels are associated with mages and they must be placed near them.
Instructions for DIY Christmas nativity scene
There are many ready-made Christmas nativity sets in the stores but we think that joy of making your own nativity scene can’t be replaced even with the most expensive set from the store. In the following text we will give you instructions for DIY stable which anyone can build in their home without any professional help. First you need to gather supplies like branches, twigs, eucalyptus and redwood bark, some palm fronds maybe, but it doesn’t really matter because you can use any type of wood you can find. Beside that you will need a piece of plywood for the base. For this project we used 6×8 inches piece of plywood but you can use what ever size you want. We advise you to cut the plywood with jigsaw for a nice clean cut. The front support are 12 inch branches which are glued to the base and secured with wood screws from the bottom. The strong bark was used to connect the front support branches but you can use what ever you can find. We connected it with staple gun but you can use wood screws also, but first drill the holes for the screws because otherwise the branch may crack. The two rear side supports are also 12 inch tall and glued and secured from the bottom with wood screws. The center rear support is taller and it is about 14 inch. Cut the end of the center support at an angle to accommodate the roof.

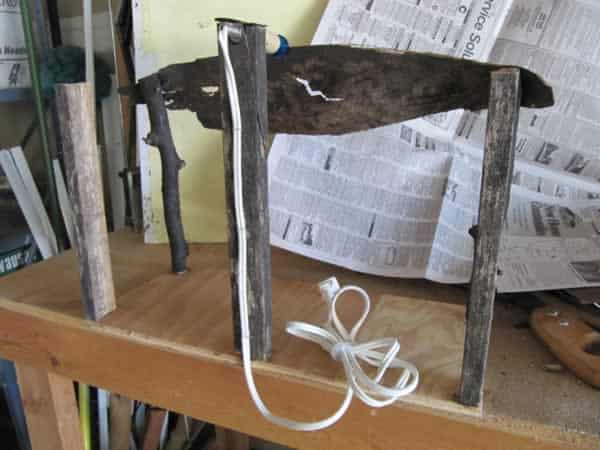
Our center support had a hole in it which inspired us to take apart an old 15 watt lamp and insert the cord but it is also easy to drill a hole for a light. Make sure the bulb clears everything by an inch or so because it heats up when it is on for a longer period of time. On the picture below you can see how the cord is stapled down the center rear support.
Now it is time to put the roof and the rear panel of the stable. For the roof we used two masonite boards but you can use plywood or whatever you can find. Make the right plank a little wider to overlap the left and glue it in place with wood glue. Also cut and glued strips of plywood on the base between the supports. In the back also glue a plywood strip towards the roof. We ripped and glued strips of grassy palm tree to each side of the roof but you can use straw or whatever material you want to get the look you want. If you choose to use palm tree strips keep in mind that you have to put a little weight on it and leave the glue to dry over night. Bits of bark are glued to the front and glued to fill any loose strands of roof.
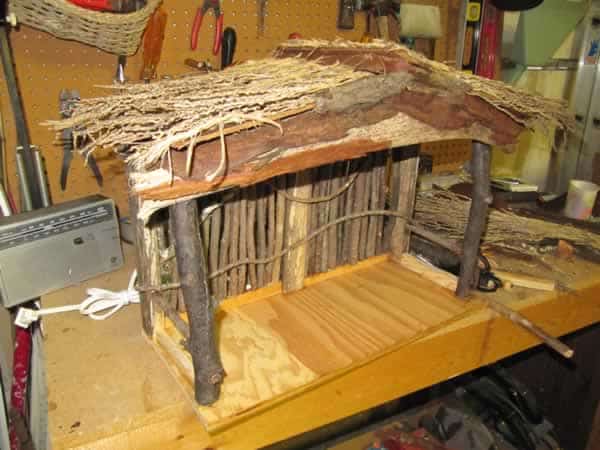
The back wall is made of twigs cut to fit between the ply-board strips and glued in place. The horizontal, twirly twigs along the back are just for looks. The twig rails on the sides and the twig decorations is provisional and you don’t have to copy them, you can make whatever you like best. All you have to do now is to put some straw to cover the plywood and to arrange figurines and your Christmas nativity scene is completed. Some people like to add details to their scenes and most common ones are pathways, creeks, boulders, grass, trees etc. but that is up to your imagination.
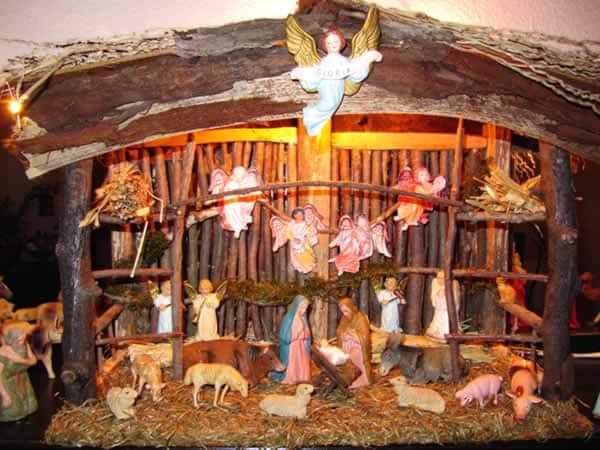
As you can see, building your own Christmas nativity scene is quite an easy project and all you need is a little imagination. The figurines on presented scene are bought at the store but you can made them yourself if you have the time. There are several ways of making Christmas nativity figurines in your home. If you want most realistic figurines then you can buy molds and make the figurines out of plaster and they paint them yourself. Another way is to try out your sculptorial skills an make them yourself out of modelling clay. And the simpliest way is to make them out of cardboard or paper. If you aren’t artistic type, you can buy ready paper templates and just cut the figures out.
We hope that we inspired you to take the tradition back to your home and that you will make beautiful Christmas nativity scene in your home this Christmas.



Add comment