[ad_1]
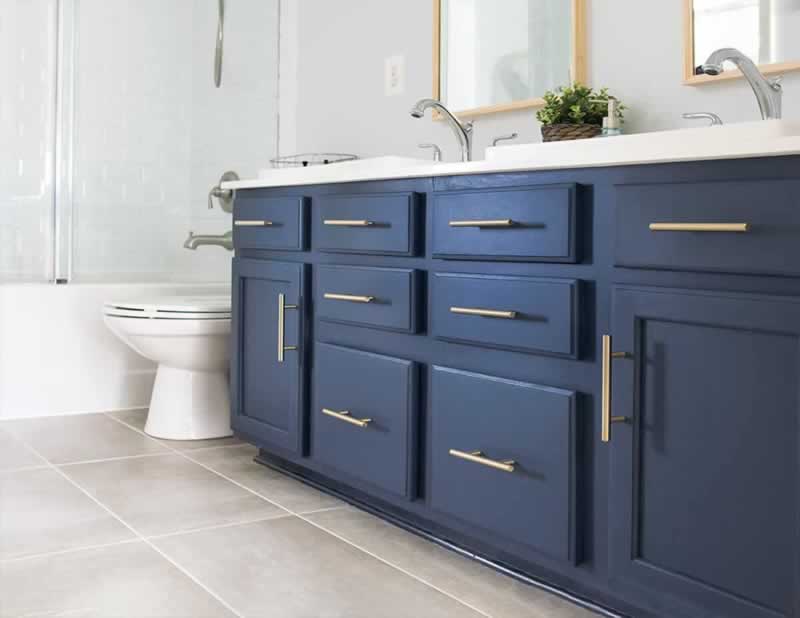
A bathroom cabinet is not just for storage but can create a style statement in the bathroom. Perhaps if you are looking for the easiest ways to upgrade your bathroom without a makeover, then you may consider replacing a vanity unit. But if you are limited on a budget then painting a bathroom cabinet can bring a new life to interior.

This DIY project can be done over a weekend, and it is an excellent way to add a personal touch to your bathroom without breaking the bank. Whether you’re a seasoned DIYer or a beginner, this guide will walk you through the steps of how to paint a bathroom cabinet and help you achieve a professional-looking result.
Things You Will Need to DIY Paint a Bathroom Cabinet
- Paint. It is a specific type of oil-based paint that will protect the cabinet from humidity and water damage.
- Primer. It is required to apply on the cabinet as it helps adhere the paint better while providing cleaner look and finishing touch. These are great for preventing any stains or tennis on the wooden surface.
- Sandpaper You will need it to smooth out the surface of the bathroom cabinet. It will also remove any existing finish and help you prepare the surface that easily works primer and paint.
- Paintbrushes or rollers These come in two types, so you will need to pick the one amongst angled or flat surfaces. You need them to apply the primer and paint on the cabinet. An angled brush is better in terms of easier reach to the corners, while a flat brush makes it a better choice for larger and flat surfaces.
- Paint thinner. You will need to mix this liquid to create a thin paint. It is used as a mixing agent before you start painting.
- Tack cloth or clean Cloth. It is a piece of Cloth that is suitable for removing dust or debris. You will need to clean the surface before using sandpaper.
- Painter’s tape: Used to protect any areas you don’t want to paint, such as the walls, countertops, or hardware.
Optional: Paint sprayer, respirator mask, and gloves: A paint sprayer can help you apply paint more quickly and evenly, while a respirator mask and gloves can protect you from any harmful fumes or chemicals in the primer and paint.

Step By Step DIY Pross To Paint a Bathroom Cabinet
You will need to take the following steps to paint a bathroom cabinet as a DIY over the weekend. It will take around 3-4 hours to complete the project.
Step 1. Prepare The Bathroom Cabinet for a Paint
Before you can start with the actual paint of a bathroom cabinet, it is very important that you make proper preparations other than having all the items required for a painting.
- Cleaning The Surface. Take a piece of tack or clean Cloth and dust the cabinet completely. Remove all the dirt from the surface and make sure that it is completely clean.
- Sanding and DE glossing. Now use sandpaper and DE gloss and smooth the surface. It will remove the paint that is already on the cabinet.
- Repair any damage. Should you find any damage, use the filler to fill the gaps and sand again. It is important that you repair the damage before starting a painting. You can check Royal Bathrooms UK for an extensive range bathroom cabinet available in various attractive Colours and budget prices.
- Apply Primer. After you have repaired the surface and DE glossed it, you will need to apply the primer. It will help the better-quality paint application onto the surface.
Step 2. Painting The Cabinet
Now the first step of the painting process is complete, and you can start painting the bathroom cabinet.
- Choosing the right paint type and color. You will need to choose the oil-based paint. Such paints are suitable for applying to any hard surface like wood and metal etc. You should check the description before making sure you are getting the right paint.
- Paint application techniques. Your technique of painting depends on whether you are using a roller or a brush. For a cabinet, a brush is always a better option. Simply dip the brush in the paint and start applying it on the surface. Then spread it in all directions creating a uniform application.
- Sanding and Cleaning Between the Coats. Once you have completed the application once, you can make it smooth by light sanding the surface. The purpose is to make paint uniform on the surface. It is done after the first coat is complete, and you can go for the second coat in the same way.
Step 3. Give It a Finishing Touch
Once the painting is complete, you can start giving it a finishing touch. What you need to do is let the paint dry and assemble in case it is disassembled before painting. You may probably require removing the worktop if it is what you need to remove. Prevent your cabinet for a couple of days from exposure to humidity, and after that you can start using it again in the bathroom.
Final Thoughts. There are two main purposes for painting a bathtub. It can either be for making the cabinet last long or for aesthetics and vice versa. For whatever reasons you go are painted, our step by step guide will help you along the way.
Share this tip with your friends!
Page load link
Source link


Add comment