Winter camping is a unique experience. You can go camping with fewer crowds and witness rare wildlife. The only thing holding you back might be your fear of the cold. Cold weather can be dangerous, so it’s best to wear layers to be as warm as possible. The only question remaining is, how many layers?
Three crucial layers are needed for winter camping; a base layer, a mid-layer, and an outer shell. These layers keep you warm while also providing ventilation. You need your layers to be breathable to move moisture (or sweat) away from your body to prevent you from getting cold and/or sick.
After describing the three key layers in detail, we talk you through other optional layers you can consider, such as hats, socks, gloves, and face coverings. The latter part of this article discusses what material you want your layers made out of and how to take care of these materials. The better cared for, the longer and better insulating your layers will be.
Three Essential Layers For Winter Camping
To begin our layer journey, you have three essential layers that you’ll need for your winter camping trip. These include your base layer, mid-layer, and outer shell layer.
If you fail to dress appropriately on a winter camping trip, you could put yourself at risk. Read on to find out how these layers work and why you need them.
1. Base Layer
This layer should act like a second skin and fully cover your arms, legs, and torso. Its function is to insulate body heat and also evaporate sweat and moisture from your skin to push it away from your body.
Moisture caught between your skin and base layer can make you cold, so it’s important to pick breathable material.
You also want quick-drying material if you work up a bit of a sweat putting up your tent! We recommend selecting a base layer made from merino wool or polyester.
2. Mid Layer
Your mid-layers only purpose is to insulate your body. Ideally, you want a mid-layer for your legs (pants) and a mid-layer for your arms and torso.
For your upper half, choosing a fleece or jumper that is thicker than your base layer is best. You want slightly thinner insulating material, such as polyester, for your legs.
You need to ensure that you’ll have some ventilation throughout your layers. Otherwise, you’ll build up more sweat than your base layer can push away.
Make sure you plan your mid-layer to fit how intense your winter camping activities will be. If you plan to hike to your camping ground, wear thinner mid-layers.
Wear thicker mid-layers if you are planning to be stationary outside for longer periods.
3. Outer Shell
Your outer shell is the last crucial layer you’ll need for winter camping. This layer is designed to protect you from rain, wind, or snow. Your outer shell will include a waterproof jacket and waterproof pants.
Most likely, your insulating layers are not waterproof, so this layer will protect them. You may not need to wear your outer shell the whole time you are camping.
Perhaps you won’t have to wear it at all! It’s better to have it than not to. If your mid or base layers become damp, you could risk catching hypothermia.
Additional Items You Can Wear
You may want to consider putting several other layers on, whether inside or outside your tent! These can include a hat, a pair of gloves, socks, boots, and perhaps even a face covering.
With all these layers, you can be sure you won’t be cold.
1. Hat
Your head has a high surface-to-volume area, and since it’s packed with blood vessels, you can lose up to 70% heat. That’s why it’s a great idea to wear a hat when winter camping.
There are so many different types of hats you can wear during your winter camping trip. You need to consider how breathable it is and how much warmth it provides.
Your head is a beacon of warmth, so you need a hat that can keep up with your head sweating and your head freezing.
Wool hats can be moisture-wicking and insulating, especially if you get a double-knitted design. You can also opt for a hat with ear flaps, so you won’t have to keep pulling the hat down to cover your ears.

2. Gloves
Just like your feet, your hands are one of our body’s extremities most likely to suffer from cold weather.
It’s also more common to suffer from frostbite in your hands or feet because these body parts receive less blood flow. Gloves are a shield for your hands against the cold.
There is a range of gloves you can choose from, from color to material to shape. You want to select gloves that are waterproof and insulating.
While mittens may be aesthetically pleasing, they may not be practical for wearing while cooking. Consider your camping activities because this will affect which glove is most helpful to you.
3. Boots
Whether you’re putting up your tent or cooking dinner over a campfire, you will need to ensure your feet stay dry. If your feet get cold and wet, you can risk catching frostbite.
Frostbite is when your skin freezes. This also damages the underlying skin layers and can lead to inflamed or discoloration, severe pain, and at its worst, amputation.
A good, sturdy, and waterproof pair of boots can prevent this. If you are camping in the snow, opt for a pair of boots made by Goretex, as they will be guaranteed to keep your feet dry.
Another tip is to not leave your boots on the outside of your tent when you sleep. If you leave them outside, they’ll likely be frozen or damp in the morning.
4. Socks
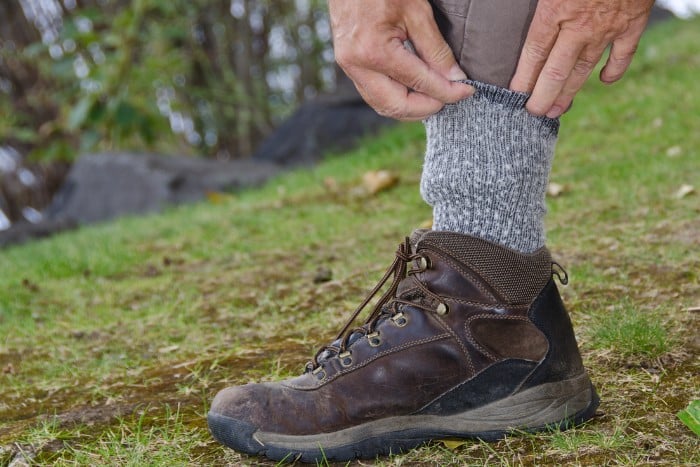
It’s important to wear socks that will continue to insulate even if they get wet.
Your boots might be waterproof, but with prolonged time in the wet, you never know if water might seep through to your socks and make your feet extremely cold.
You can prepare for this by wearing 1 or 2 layers of woolen socks. Woolen socks will retain some insulation even if they get wet.
Make sure that even if your socks get wet, you change them as soon as possible. Although they will still insulate, it will be less than usual.

5. Face Covering
When camping in below-freezing temperatures, you may consider covering your face when you step out into those bitter temperatures.
A balaclava is always a good choice as it will also cover your head and neck. The downside to balaclavas is they can feel claustrophobic, and it’s harder to regulate your temperature as everything is rolled into one.
Instead of this, you can consider wearing a scarf.
A scarf is more flexible as you can use it to cover your neck, your face, or both. It’s also easier to regulate your temperature and take the scarf off while keeping your hat on.
Whichever face covering you prefer, make sure you choose one made with a breathable and water-repellent fabric.
The Need To Wear Layers While Camping & Best Materials
In the winter, it’s best to camp with layers on, as this gives you flexibility if you are too hot or cold.
It’s important to have this flexibility because adjusting and putting on one layer or taking it off can stop your clothes from becoming damp or you from getting too cold.
In the worst-case scenario, becoming too cold can lead to hypothermia (where your body drops to dangerously low temperatures) or frostbite.
By wearing layers, you can avoid this and blissfully enjoy winter camping! Now you know what layers you should be wearing and why it’s important to pick a material that will be breathable yet insulating.
Below we discuss 4 materials you’ll want to keep an eye out for. Nylon, polyester, merino wool, and polypropylene are the fabrics you want your layers made of.
1. Nylon
Many campers choose nylon material products because, unlike polyester, it does not hold the smell of your sweat.
This is extremely helpful if you’re planning to hike to your campground and know you’ll get a sweat on. However, nylon cannot absorb more than 3-4% moisture.
This means it is not necessarily breathable, which is essential for winter camping. Take this example: your base layer is made of nylon and struggles to evaporate enough moisture away from your body.
It will instead become damp and make you cold, which is the last thing you need when you have two more layers on top!

2. Polyester
Polyester is one of the most renowned materials used to make winter camping layers. It’s water repellant, light, and it dries quickly.
The strong fibers used to make polyester layers are extremely durable, so you know it’s a product worth investing in. Polyester alone is not a naturally breathable material.
However, blends such as COOLMAX will assist the polyester in wicking the moisture away from the skin. A downside of polyester is that it is not very stretchy, so it can feel restrictive when wearing it.
3. Merino Wool
Merino wool is perhaps the best material to purchase for base layers, hats, and socks. It’s a lightweight material that is naturally breathable and insulating.
When selecting a product made of merino wool, you’ll most likely be shown how dense the wool is, in g/m2. The higher the density, the warmer the material.
Merino wool handles moisture well, absorbing up to 35% of its weight before it feels wet. It’s also quick drying in case it does get wet! On top of this, wool remains insulating even when it’s wet.
4. Polypropylene
Polypropylene is an altered version of polyester, which is extra warm. Also called polypro, polypropylene is much lighter than wool yet still wicks moisture away from the skin.
Like down sleeping bags, polypro is hydrophobic, which helps it move the sweat away from your body. This ensures the material won’t damp easily and keeps you warmer and drier for longer.
As a bonus, polypro is also eco-friendly, and you can purchase recycled polypropylene products.
How to Care for Your Layers?
Your layers will last longer when you look after them. Don’t worry. You won’t have to take them to the dry cleaners. Below is a list of simple ways to care for your thermal or outer layers to increase their longevity.
1. Washing
Merino wool is best washed at cold or low temperatures. Washing it on high can cause the material to shrink. I once had a merino wool jumper, and it was wonderful until I washed it on high.
The material gets tighter when washed on high, so it doesn’t feel as breathable. Polypro can also be damaged by heat, and it’s important to put it on a delicate wash to avoid damaging the fibers.

2. Drying and Ironing
It can be tempting to dry or iron thermals or polypro material, but these fabrics do not need it. When left to air dry, they already dry very quickly, and popping them in the tumble dryer could risk them shrinking.
On the other hand, down-filled outer shells are best dried with a couple of tennis balls. This prevents the down clusters from clumping and ensures your coating keeps its insulating properties.
3. Coat Care
To take care of your waterproof jacket, it’s best to avoid washing it yourself. After every use, you can use a soft brush to remove dirt on the jacket.
If your coat needs a wash, we’d recommend looking up exactly what heat to wash it at and what detergent to use.
Most waterproof winter jackets cannot be washed with normal detergent, which can damage the waterproof coating.
4. Boot Care
Your camping boots need as much love as the rest of your gear. It’s best to keep your camping boots clean and dry.
Prolonged mud on boots can damage the outer shell, and damp boots that are left undried can cause mold.
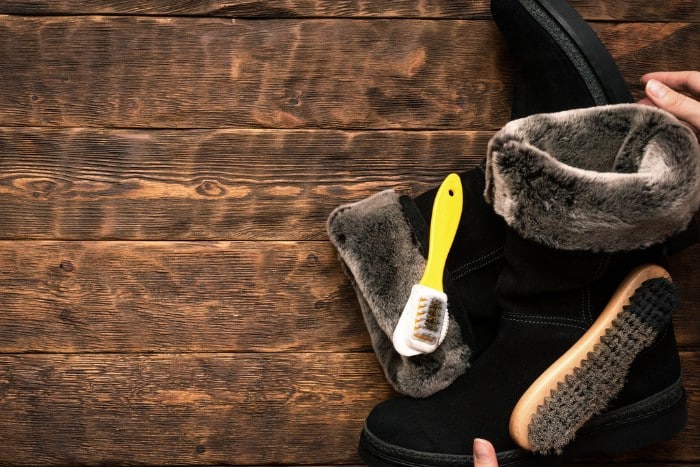
When camping, it’s best to keep your boots inside your tent. Once you’re home, clean your boots with a hose and scrub them with a brush.
If your boots are made from leather, it’s best to moisturize them to keep them waterproof.

Final Thoughts
Never forget your three layers for winter camping: base layer, mid-layer, and outer shell.
If you’re content that you’ve found your core layers but are interested in other layers for your hands and feet, then hopefully, our extra layers section gave you some ideas.
Alongside this, we recommend buying layers made from either merino wool or polypro, as these are breathable and insulating.
Finally, we recommended some ways to prolong the life of your layers with a few care tips. Happy winter camping!


Add comment