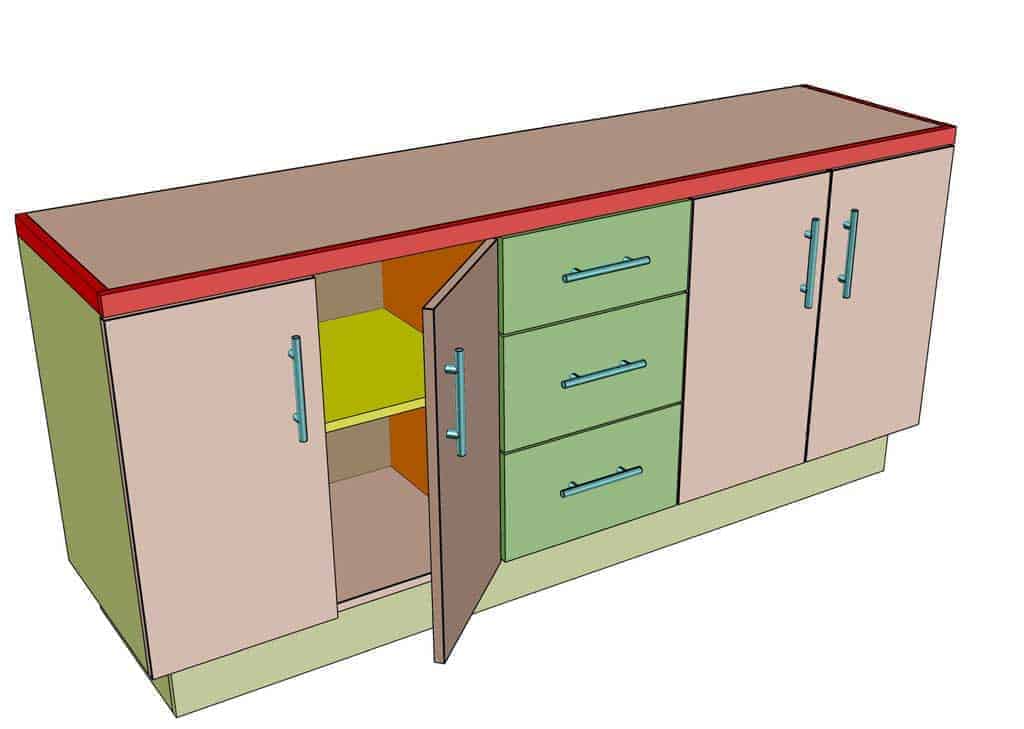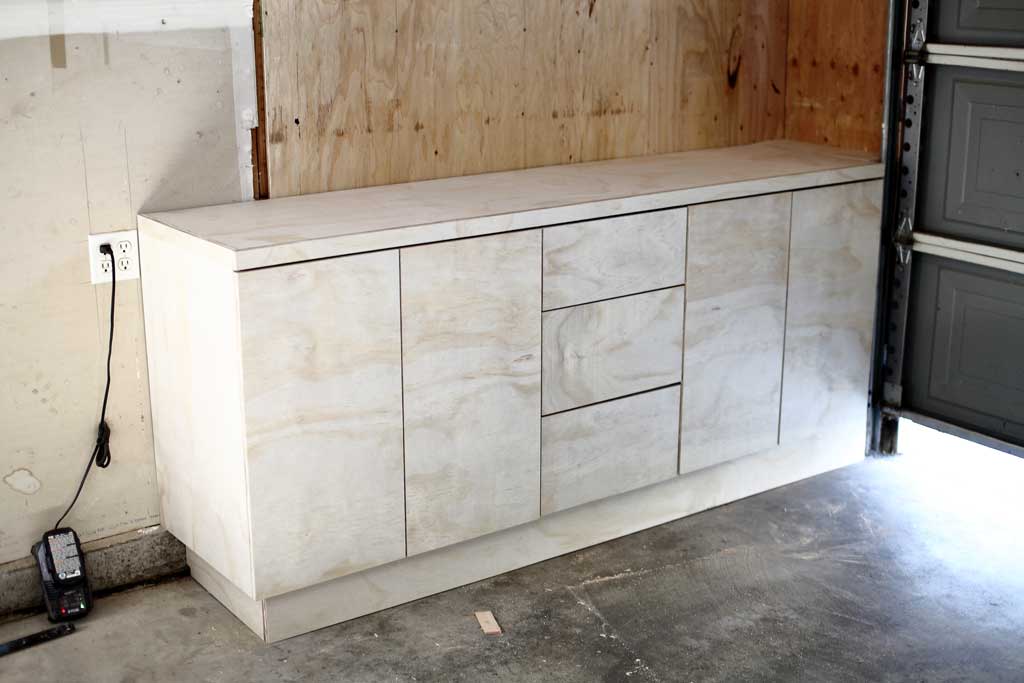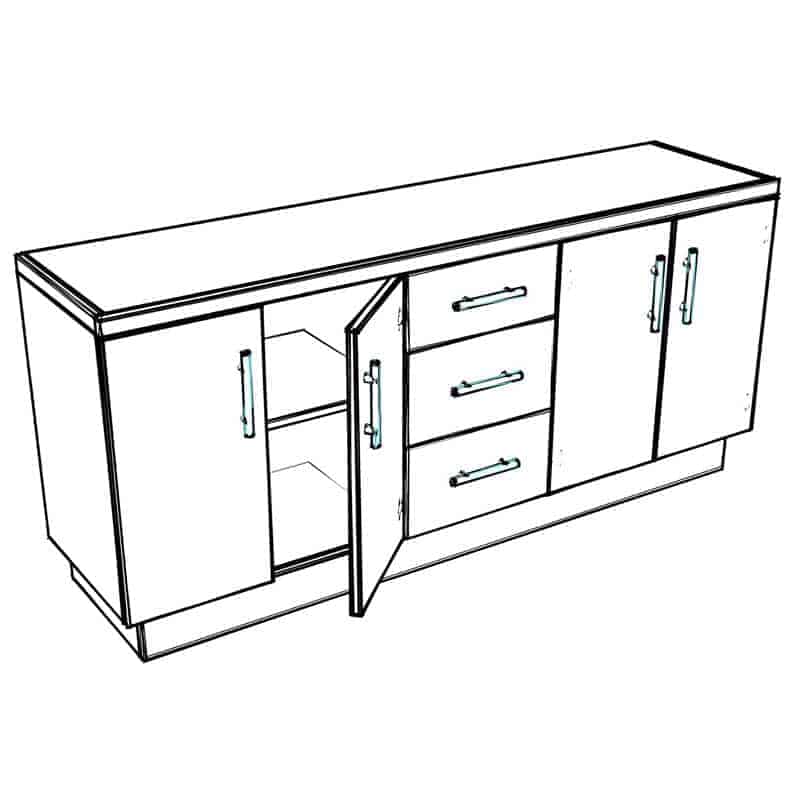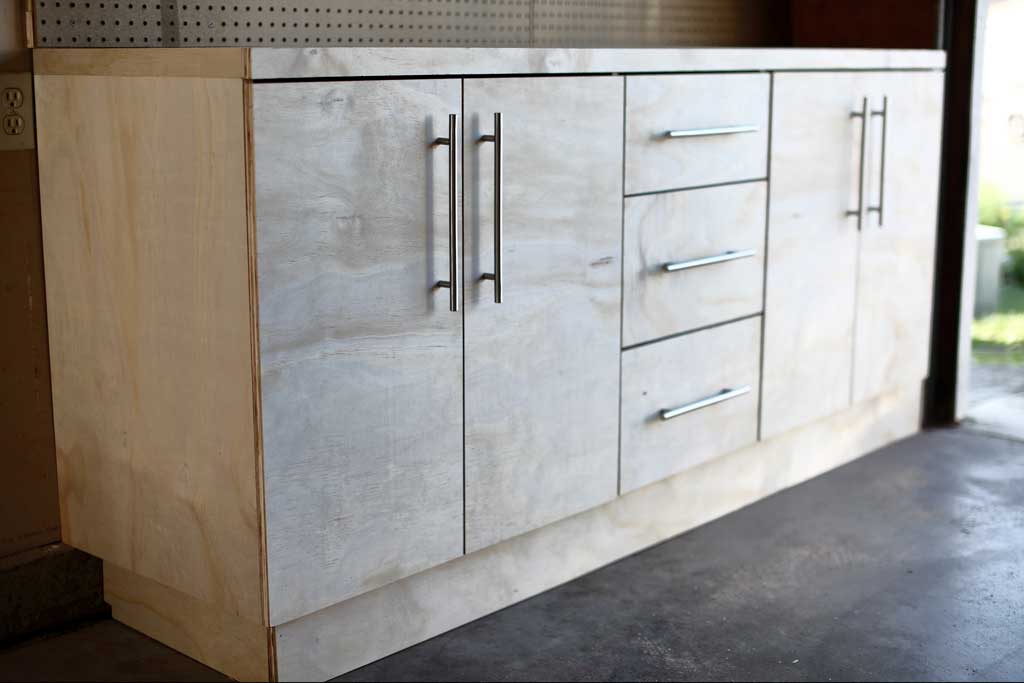
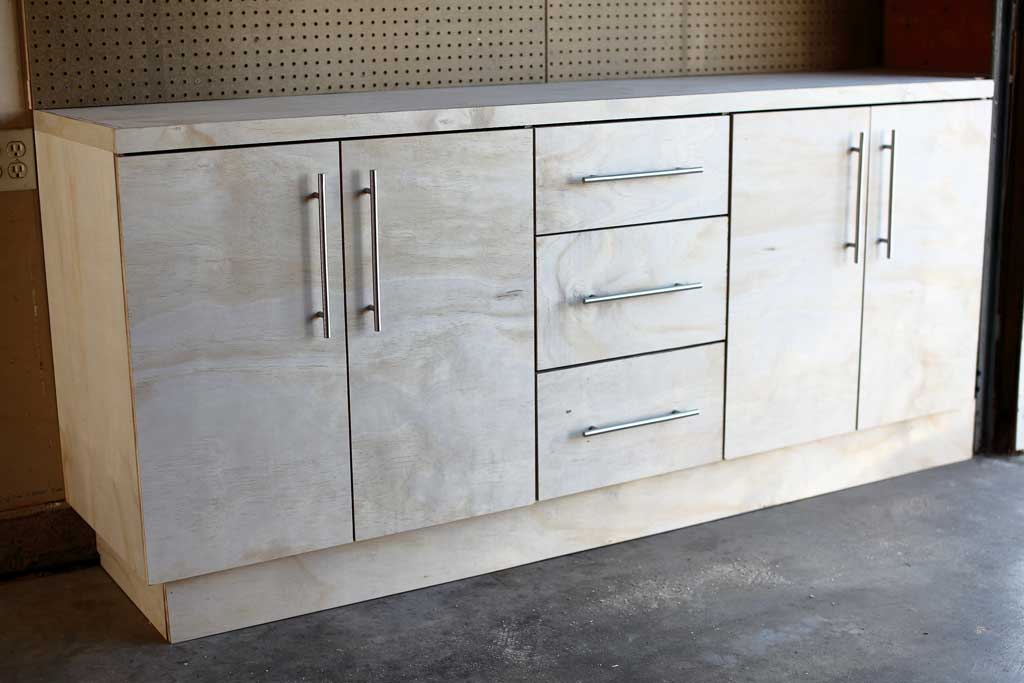
For a long time, I wanted to dedicate some time to cleaning and organizing my messy garage. So finally this week I moved everything from one side of the garage to the other and demolished the 2×4 shelves that the previous owner built. Now that one side of the garage is completely cleared out, I decided to start with building DIY Garage Cabinets with Drawers.
I love how the cabinets make everything look much more organized. Even if it’s a mess inside the cabinets, behind closed doors, nobody would notice that.
Now that the lower cabinets are complete, I moved some of the stuff from the other side of the garage and organized it inside the cabinets. But I have much more stuff that’s laying around on the floor, so I plan to build more cabinets and shelves to have everything organized. Stay tuned for my next projects.
How to keep your garage organized?
Statistics show that only 30% of us store our cars in the garage. The reason? Too much stuff. So how do we keep our garage organized? What’s the optimal solution that works best for me?
The most common solution is to install simple shelves or racks and organize your stuff there. And this might work for most people. But over the years I found that items sitting on open shelves often collect a lot of dust and cobwebs. Especially if you do any woodworking or woodcutting in the garage. Cobwebs are sticky and will attract any dust that is floating around. Having your items stored in garage cabinets or closed container is a better solution to prevent constant cleaning and dusting.
I’ve created detailed plans on how to build DIY garage cabinets with drawers for anyone interested in building these. You don’t have to have fancy tools to make a good looking garage cabinets. Every garage is different and learning how to build your custom cabinets that fit your needs is a huge benefit. Not only that, you could potentially save a lot of money by doing it yourself.
For this project, I used both skill saw and a table saw to cut the plywood boards, but if you don’t have a table saw you could use a simple skill saw for the entire project. You just have to clamp a straightedge saw guide (it could be a metal angle or a piece of plywood board) and use it as a guide for your saw. The distance between the edge of the saw’s base and the blade is 1 ½”, so you can simply position the straightedge 1 ½” from your cutting line and make a straight cut. Familyhandyman has a good explanation of how to use a circular saw.
You also might be interested in a DIY 6 drawer dresser and a closet organizer with drawers that I’ve built earlier as well as wall-mounted cabinets and pegboard wall.
Note: Lumber dimensions are listed as nominal size. See lumber sizes for actual dimensions vs nominal.
Disclosure: Some of the links on this page as well as links in “tools for this project” and “material list” sections are affiliate links.
Dimensions
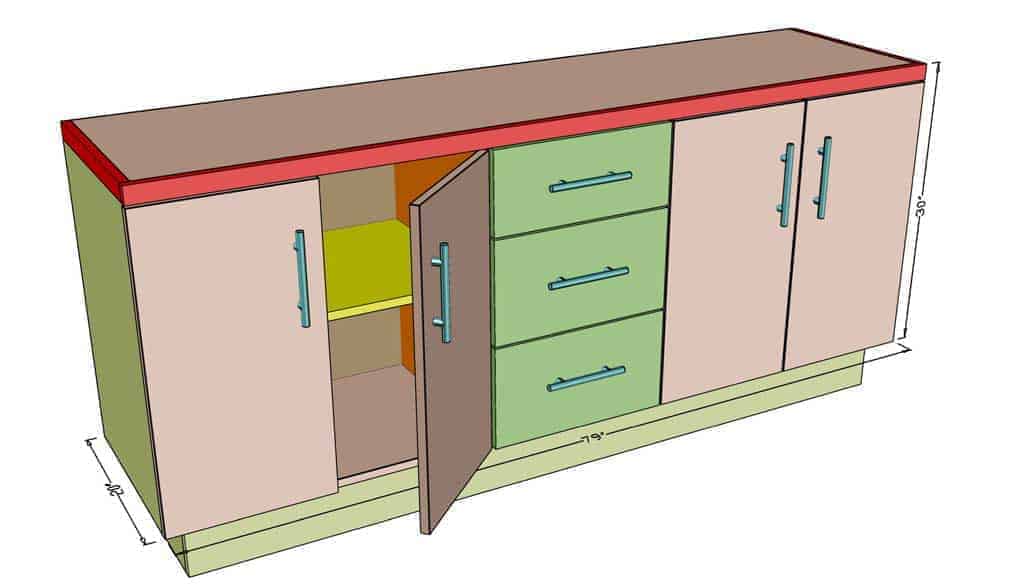
Step 1 – Build a Base for the Cabinets
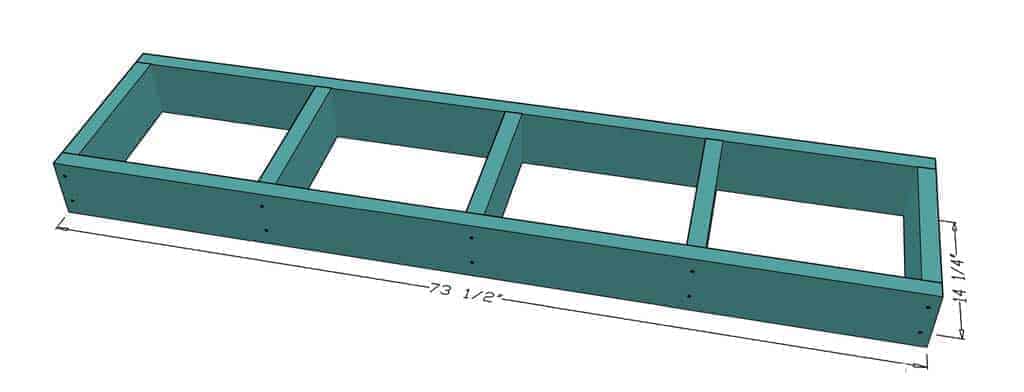
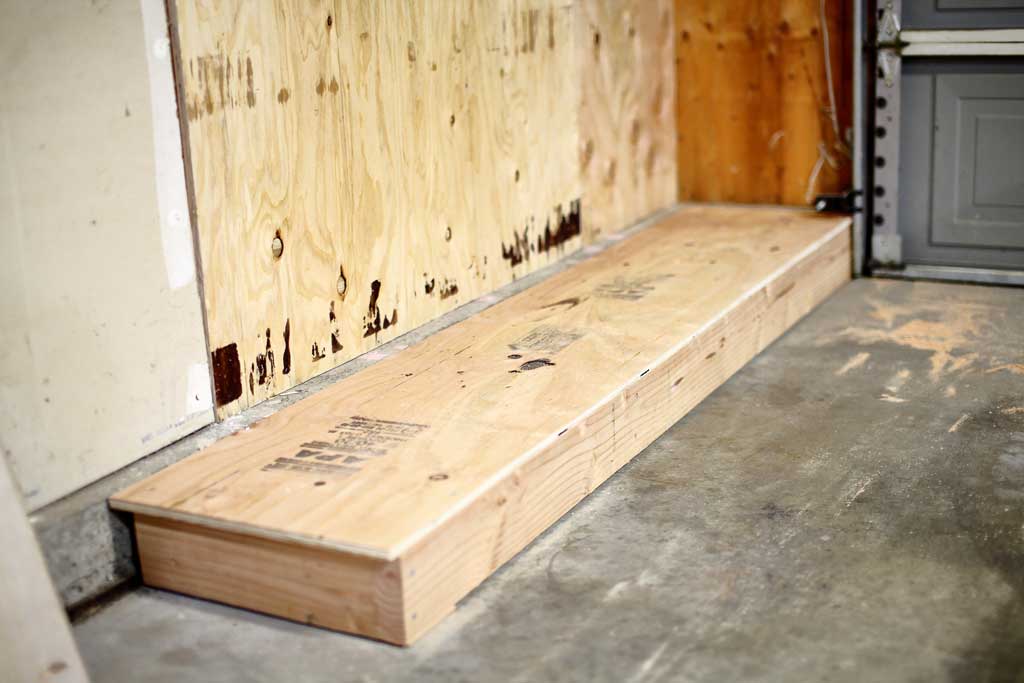
First, build a base for the cabinets to stand on. This base might be different in your situation depending if your floor is sloping or not and which direction. Since my garage floor is sloping in both directions I had to cut 2×6 at a slight angle to make the top leveled. I also had a concrete footing at the bottom of the wall to build the base around. These instructions show base made from 2×6 assuming that the floor is flat. You will need to customize the base to your floor slope or any other obstacles in your garage. Take 2×6 and cut two pieces to 73 1/2″ in length and five 14 1/4″ pieces. Attach these boards with 2 1/2″ Wood Screws from the front and back of the base. You could also cover the base with plywood or you just leave it the way it is. (Since the top of base plywood is optional, I didn’t include it in the cut list. If you choose to cover the base, you could use leftover plywood to do so.)
Step 2 – Cover Base with Plywood
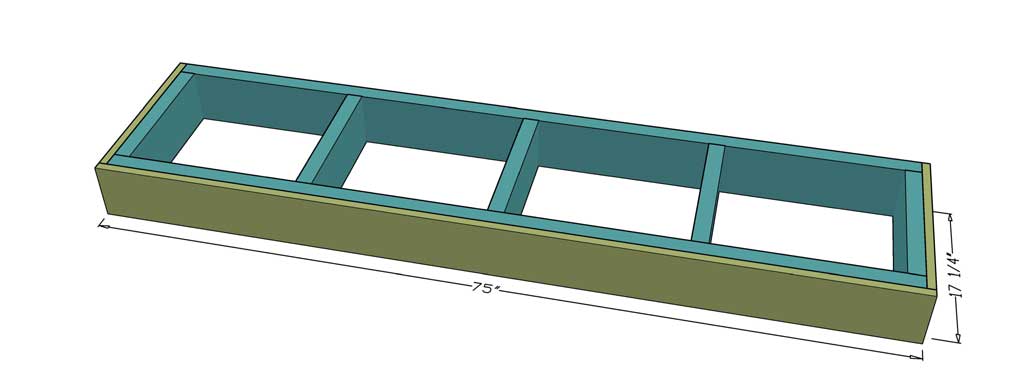
The front and the sides of the base need to be covered with 3/4″ plywood to match the cabinet color wood pattern. Leaving the base sitting just on 2×6 boards makes it look unfinished. Take 3/4″ plywood and cut one piece to 75″ in length and two side pieces to 17 1/4″ in length. Attach these plywood pieces at the top of the base with a Nail Gun using 1 1/4″ Brad Nails.
Step 3 – Cut Top and Bottom Pieces of the Garage Cabinets
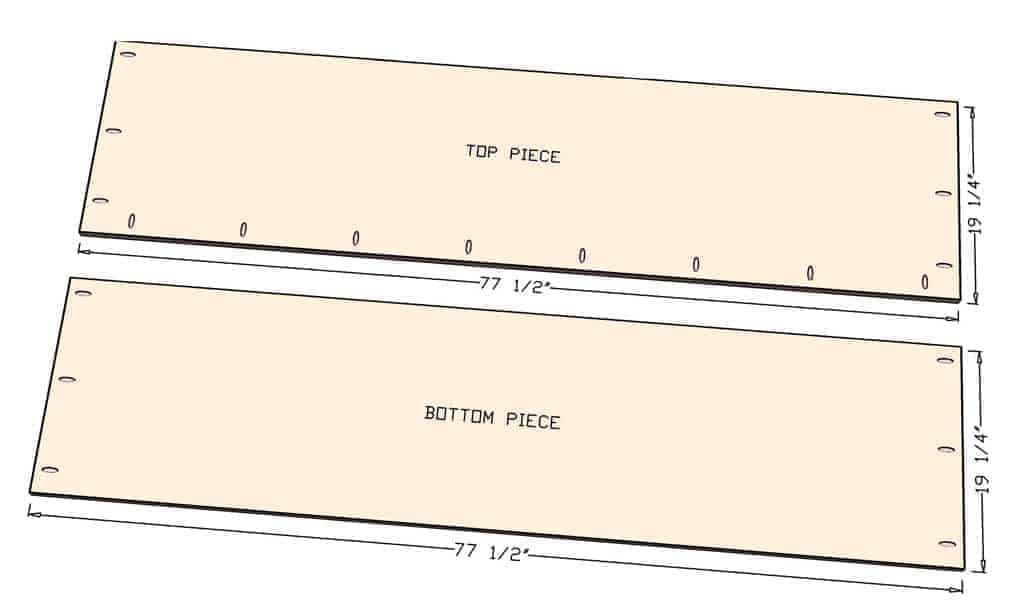
Now that the base is done, take 3/4″ plywood and cut the large pieces first to get them out of the way. Cut the bottom and the top piece of the garage cabinet to 77 1/2″ x 19 1/4″ using a Table Saw or a Skill Saw. I used a Skill Saw to cut the large pieces because 3/4″ plywood is too heavy and hard to cut on a Table Saw (unless you have a large table saw). Then drill pocket holes as shown in the picture.
Step 4 – Cut The Backboard and Side Pieces
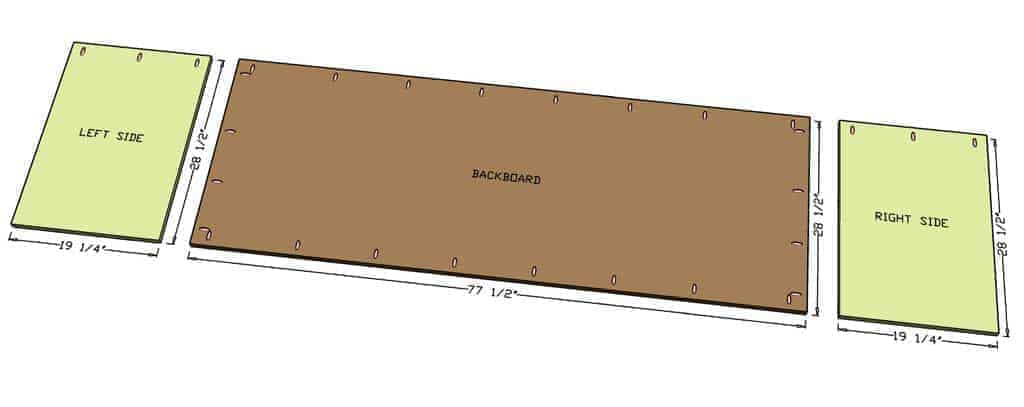
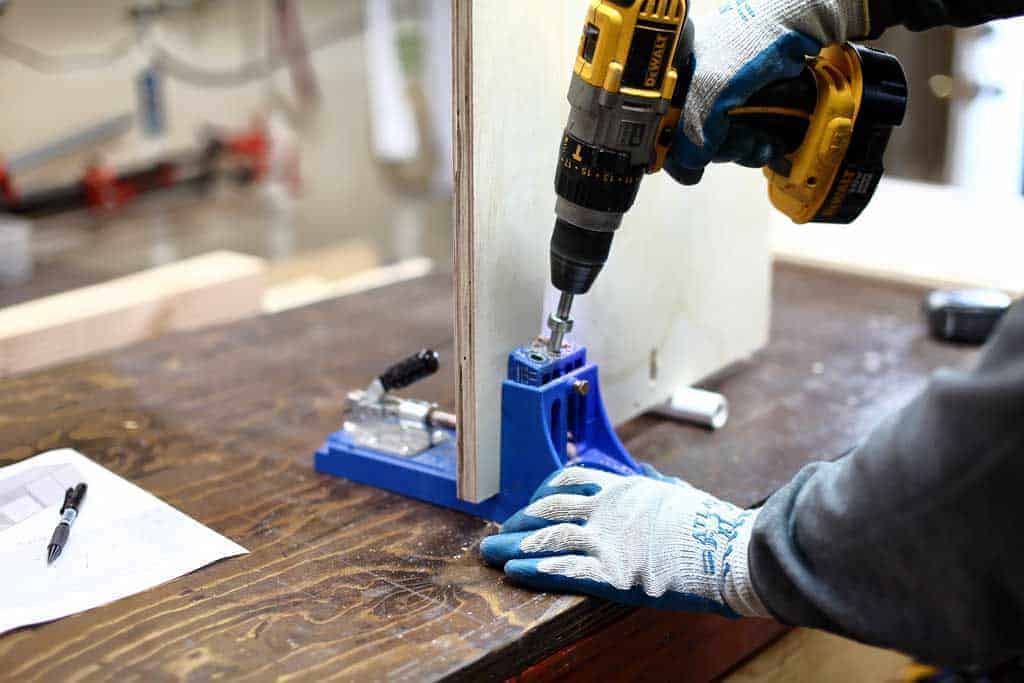
The other large pieces are the backboard and sides. Cut backboard to 77 1/2″ x 28 1/2″. Then cut two side pieces to 19 1/4″ x 28 1/2″. Drill pocket holes as shown on the picture using Kreg Jig at 3/4″ board thickness setting.
Step 5 – Attach Side Pieces to the Bottom of the Cabinet
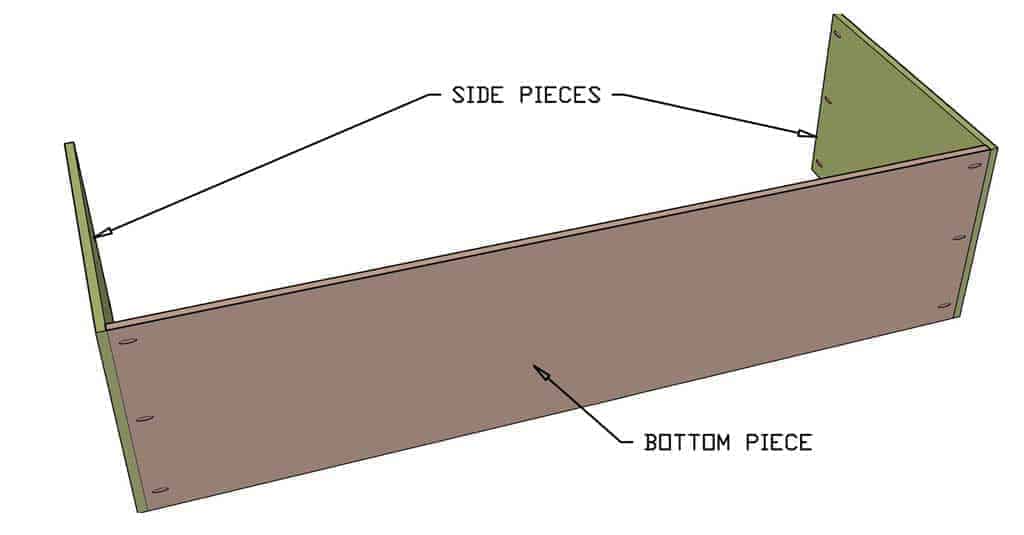
Take the side pieces and attach them to the bottom of the cabinet using 1 1/4″ Pocket hole screws. Make sure that the bottom piece pocket holes are on the bottom and the side pieces are attached having the pocket holes on the inside of the cabinet.
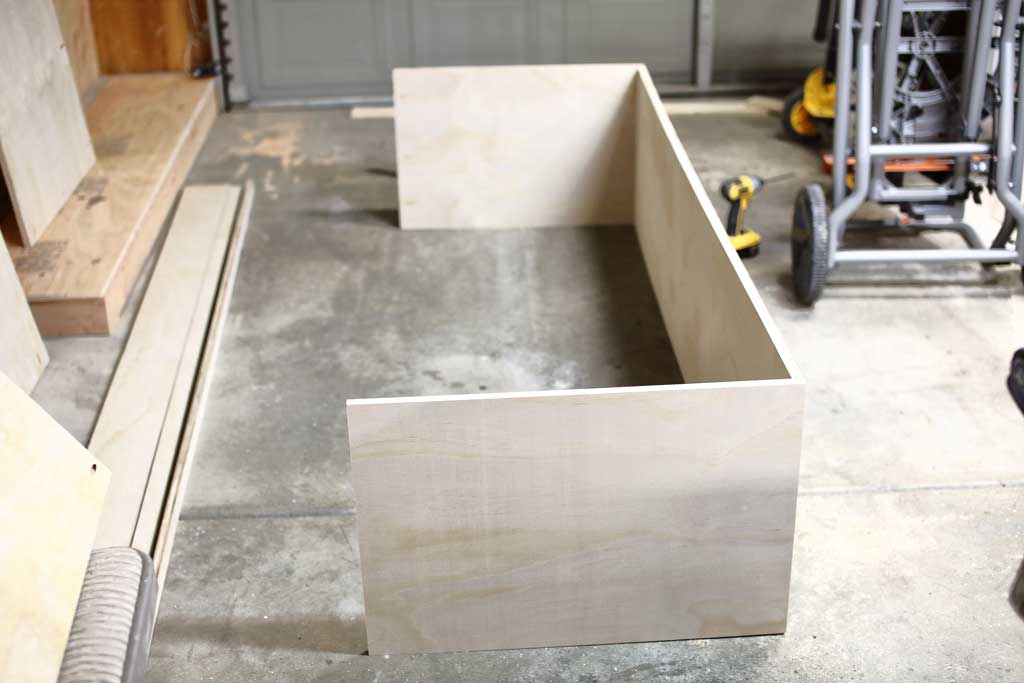
Step 6 – Install the Backboard to the Garage Cabinet
Flip the cabinet standing up and attach the backboard to the bottom and the side pieces using 1 1/4″ Pocket hole screws. The backboard will be standing 3/4″ taller than the sideboards.
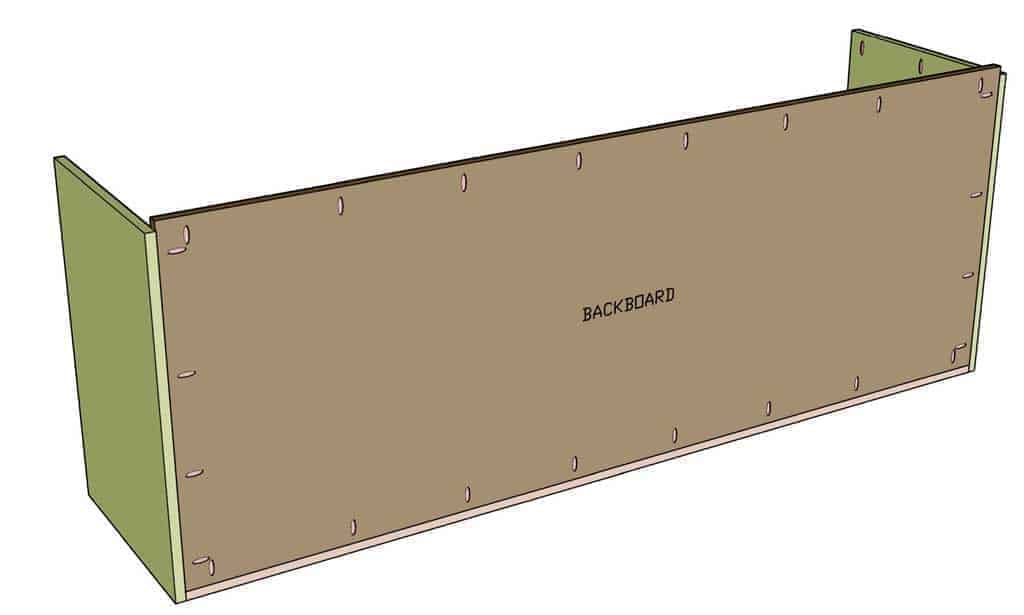
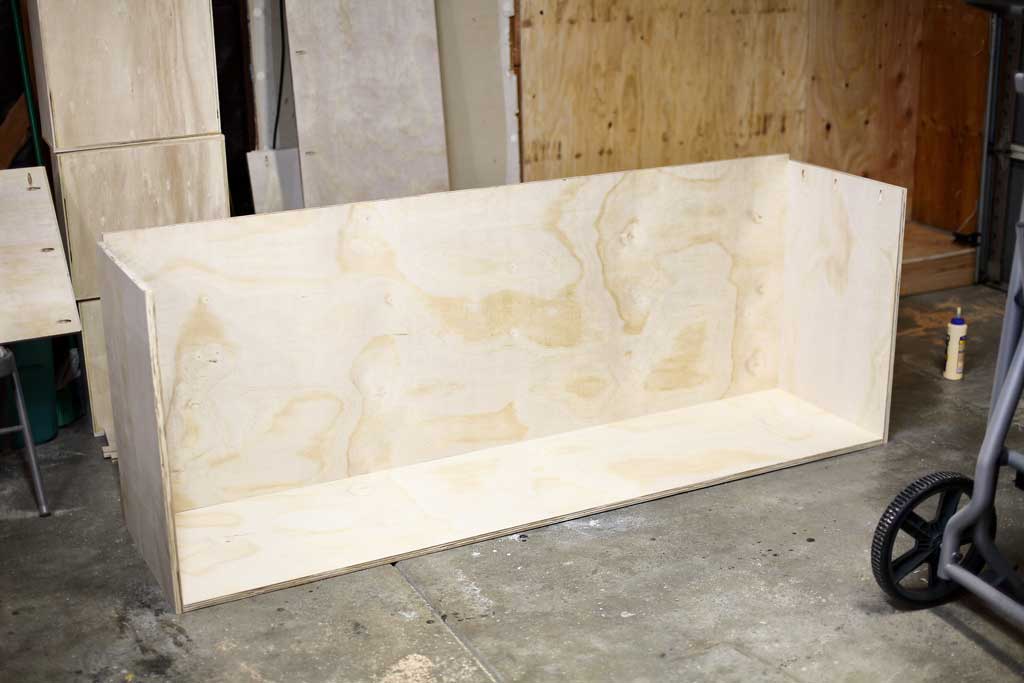
Step 7 – Cut Shelf and Middle Boards
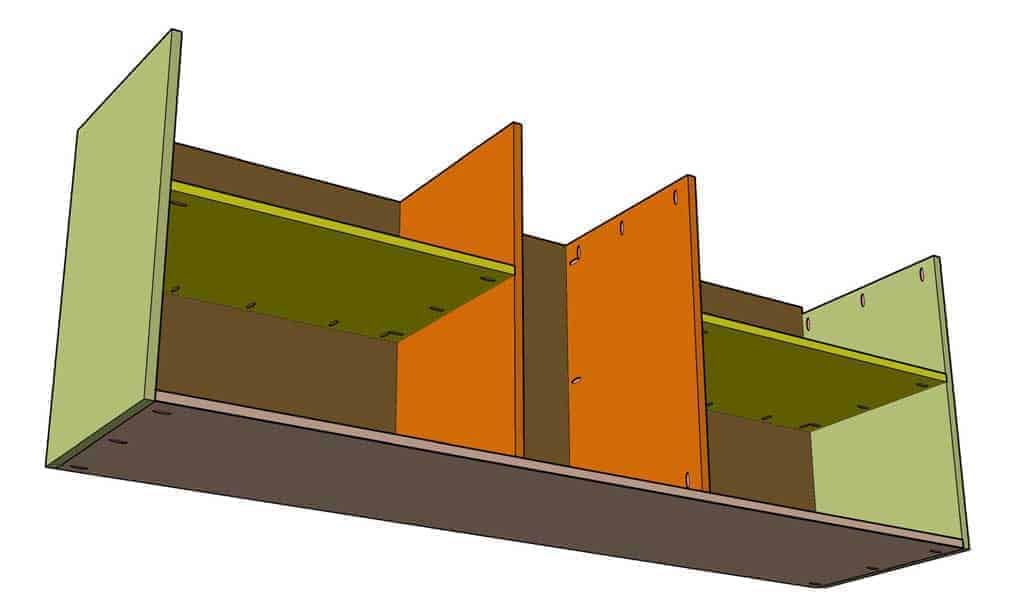
Next cut the middle boards that support the drawers and the shelves. The middle two drawer boards need to be cut to 28 1/2″ x 18 1/2″. Also, the two shelf boards need to be cut to 29 1/4″ x 18 1/2″. Drill pocket holes as shown in the picture. Shelf boards have few extra pocket holes to withstand more weight.
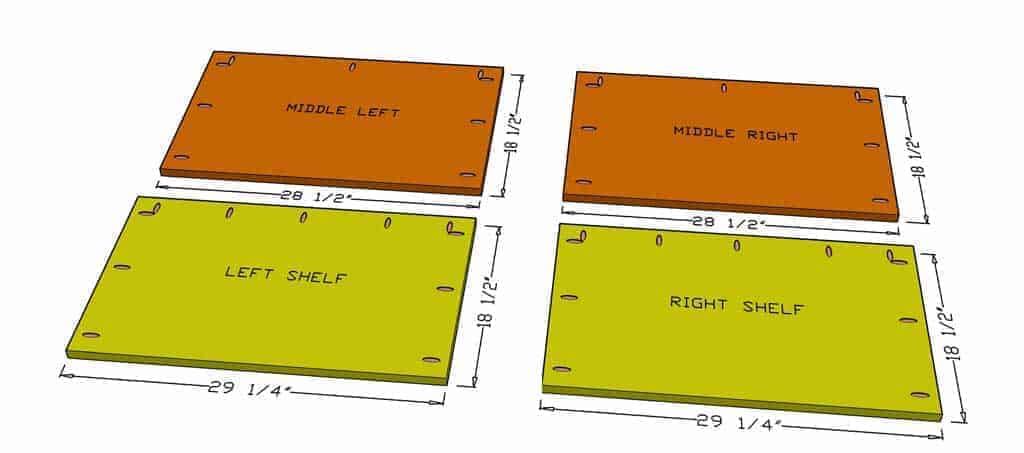
Step 8 – Install Middle Support Boards
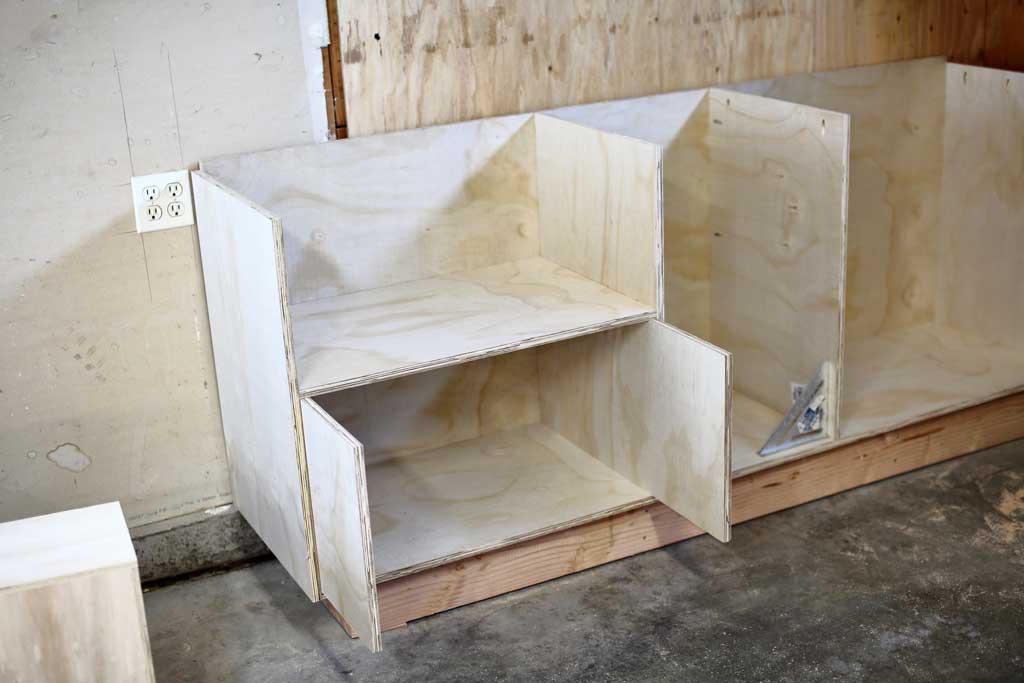
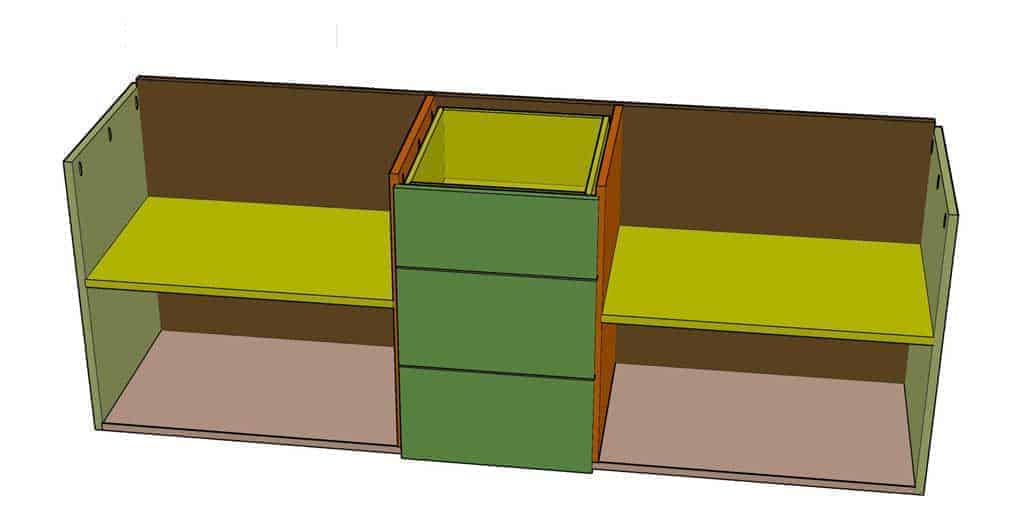
To make the installation easier of the middle drawer supports, place the shelf board at the bottom corner of the cabinet. This will serve as a guide. Also, find a bucket or a box and place the second shelf higher to get a second guide. Once the middle board is attached, remove the bucket and the shelf boards and place them on the other side and do the same thing.
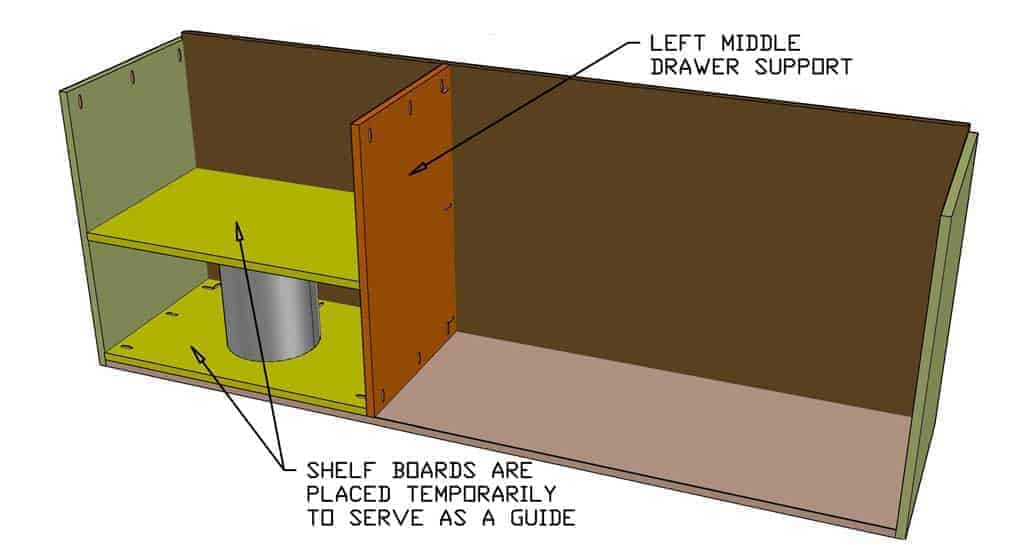
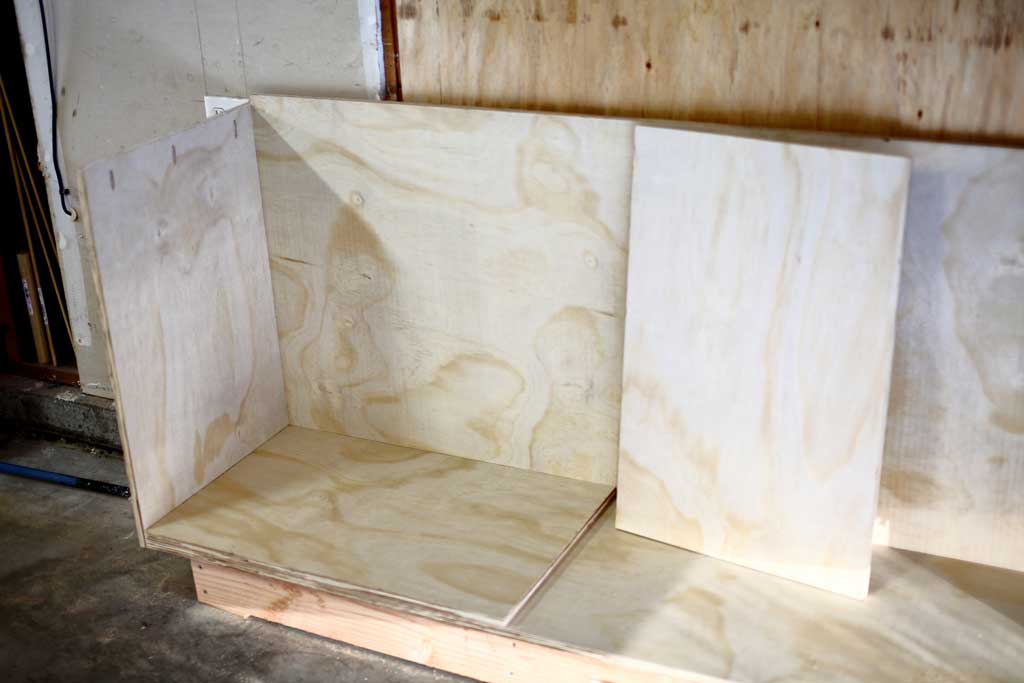
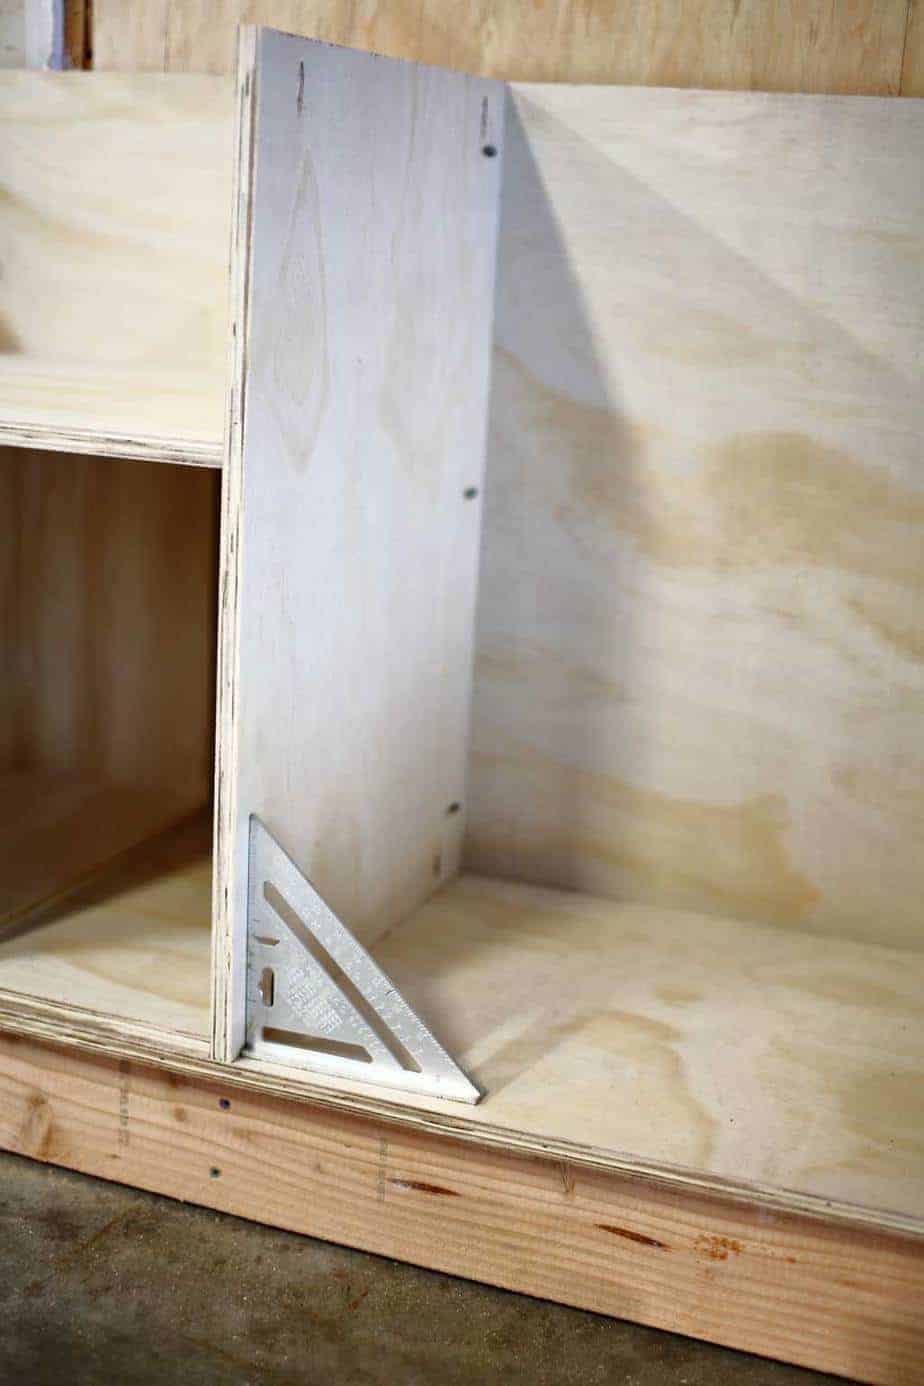
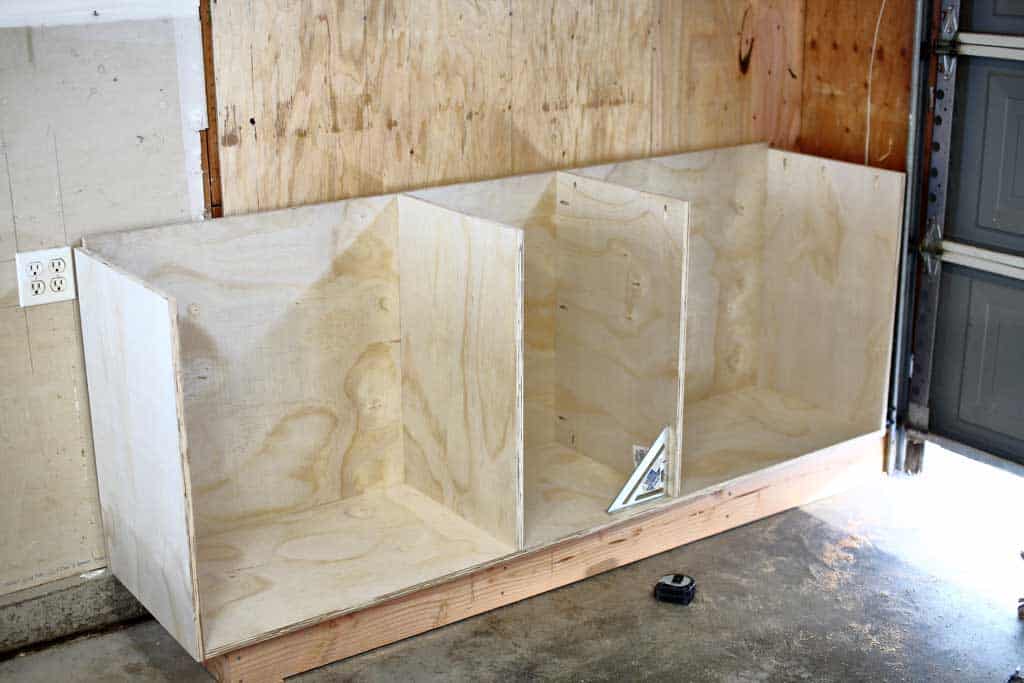
Step 9 – Attach Left and Right Shelf Boards
Since the middle drawer support boards are installed, now it’s easy to slide in the shelf boards and attach them with 1 1/4″ Pocket hole screws. Similar to the previous step, I used 15″ tall boards as a guide that I placed on each side of the shelf before attaching it. Make the installation easier without having the boards shifting when screwing in the pocket screws.
Step 10 – Use 16″ Drawer Slides for the Drawers
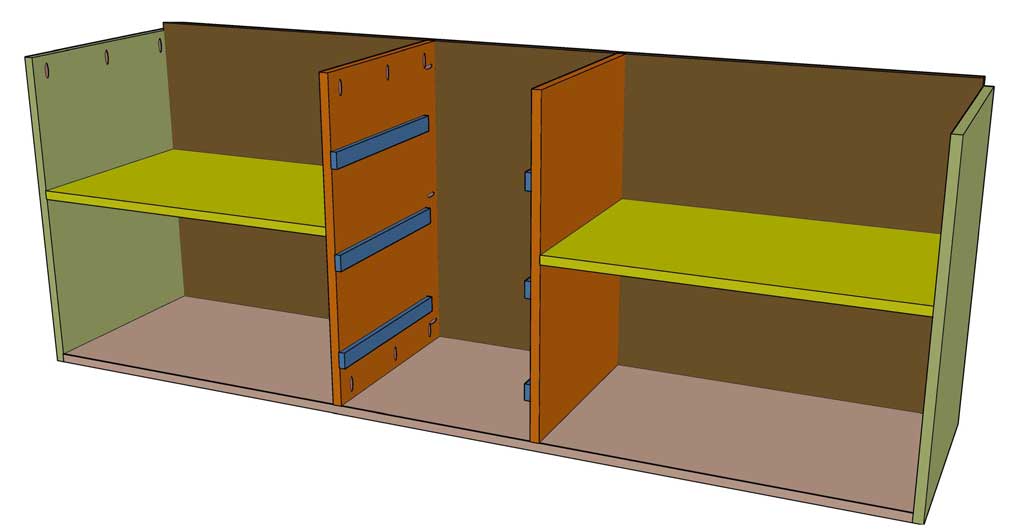
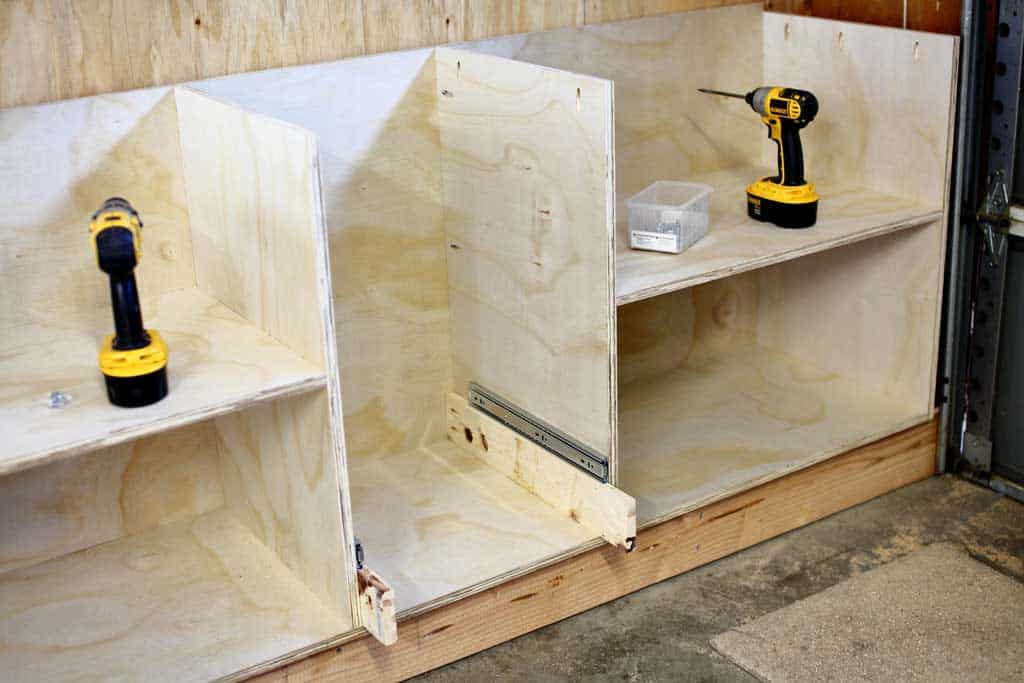
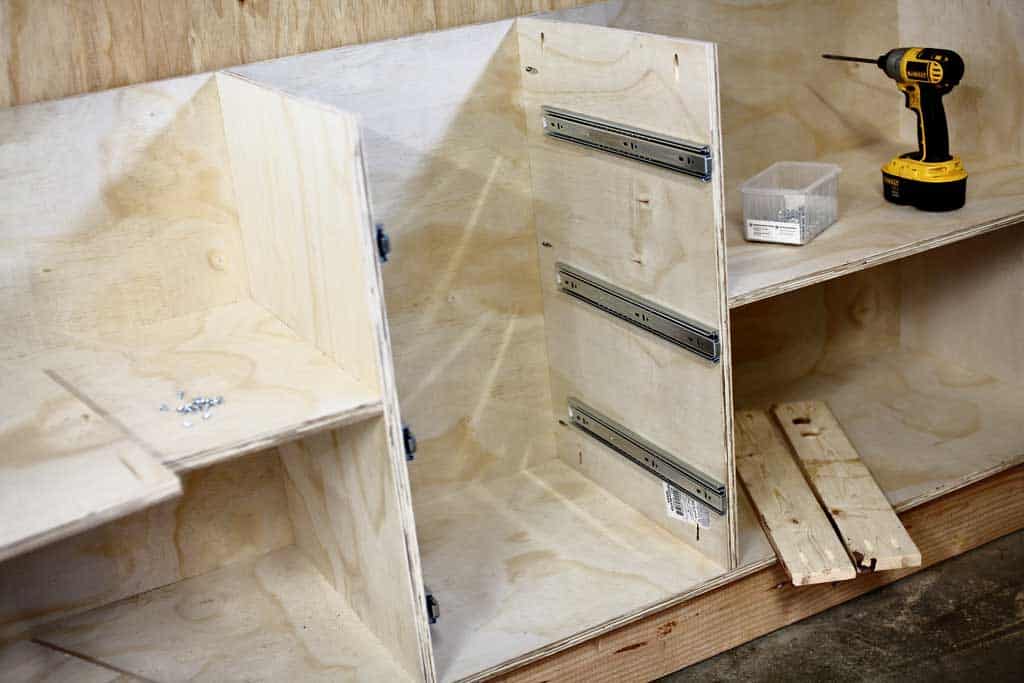
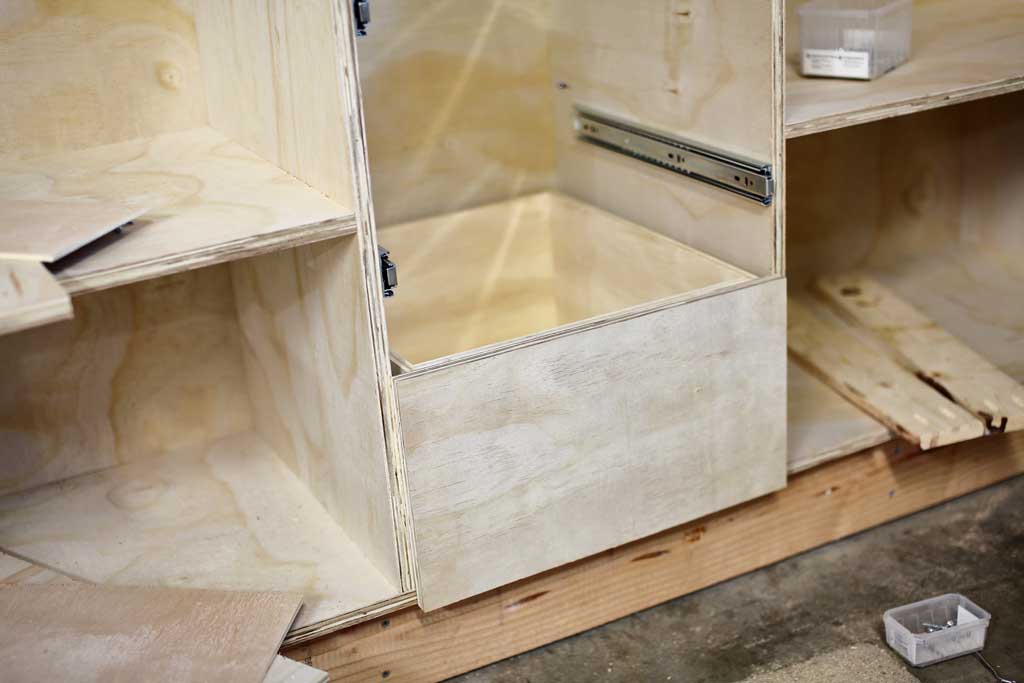
For this step, install the 16″ Drawer Slides to the middle support boards. First, place a 1×4 board on the bottom of the cabinet and then place the drawer slide on top of the 1×4. Attach it with screws that come with the slides. Then place a 1×8 board on top of the lower slide and install the second set and do the same thing for the upper set. Using 1×4 or 1×8 boards as a guide makes the slides perfectly straight.
Step 11 – Build the Drawer Boxes
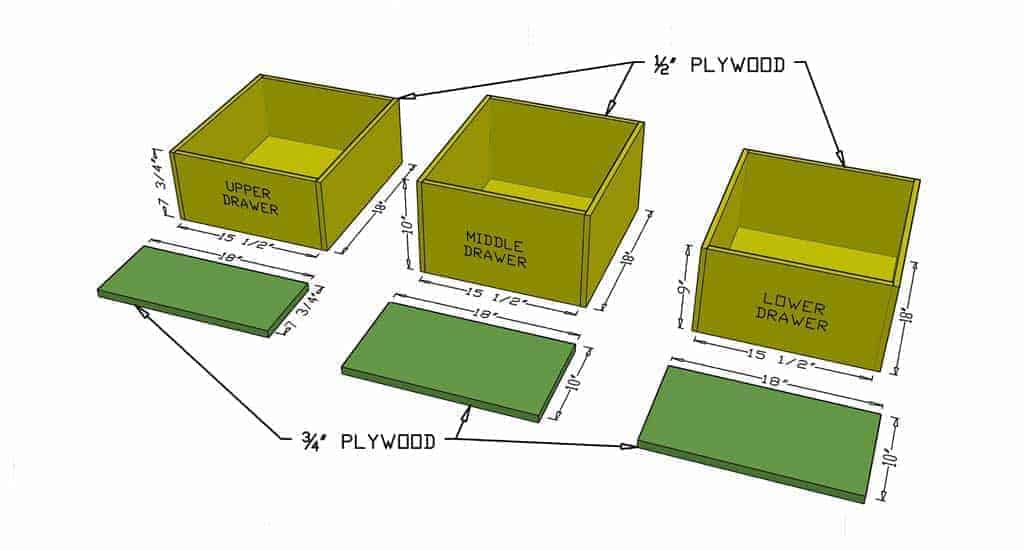
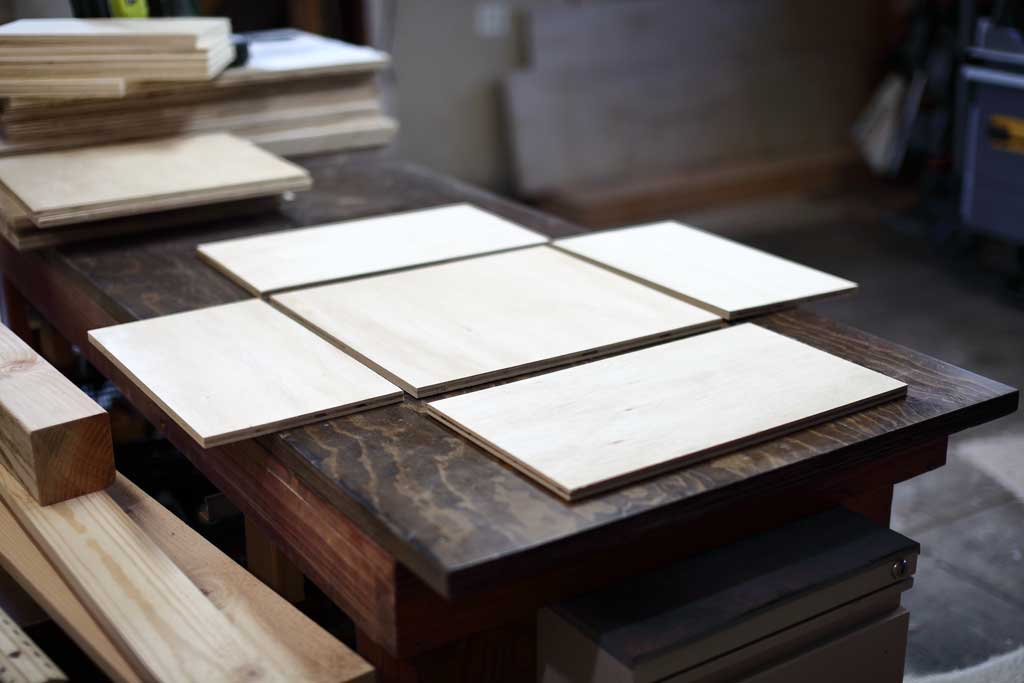
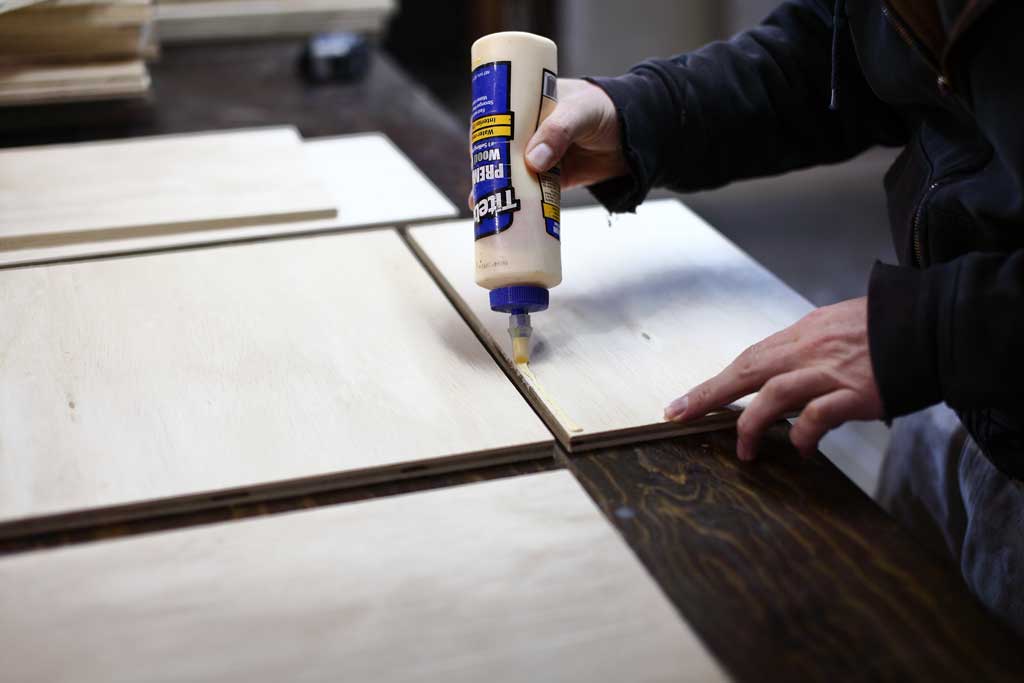
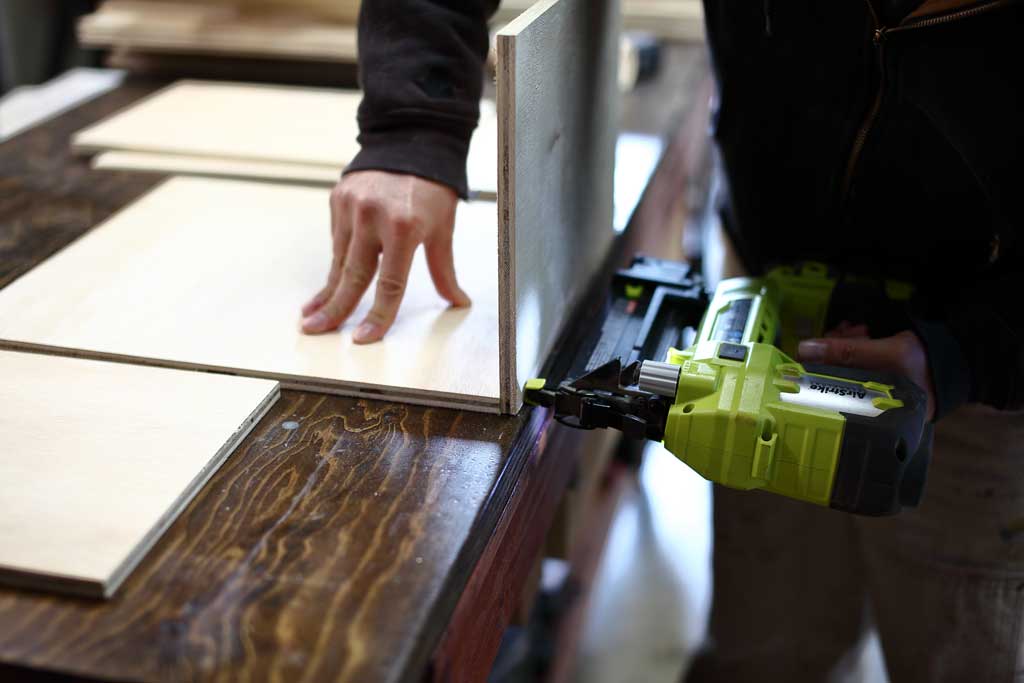
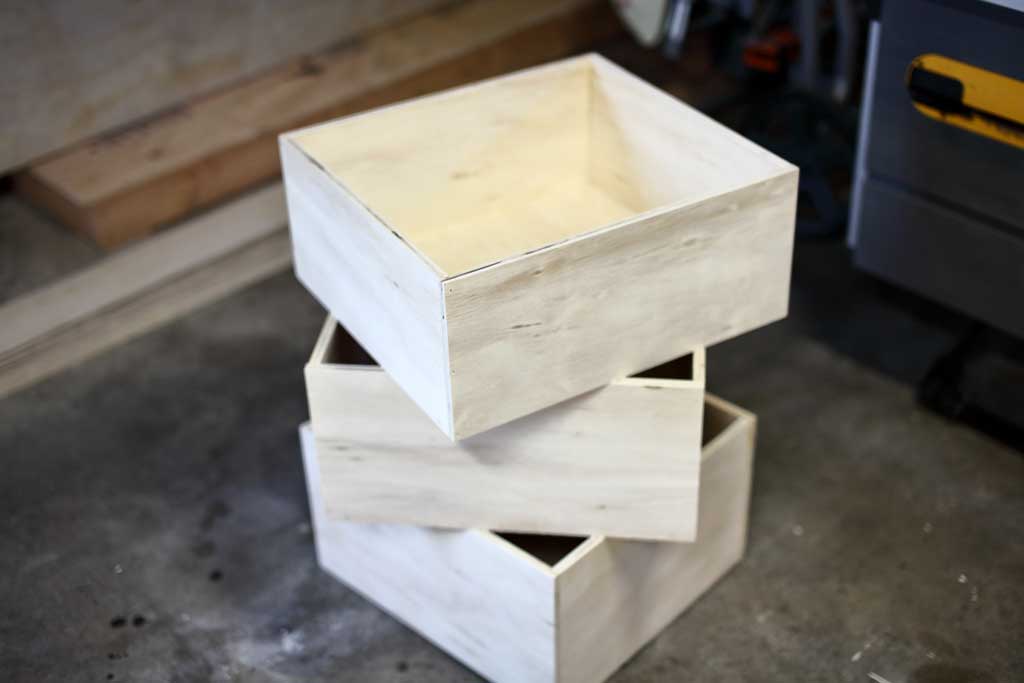
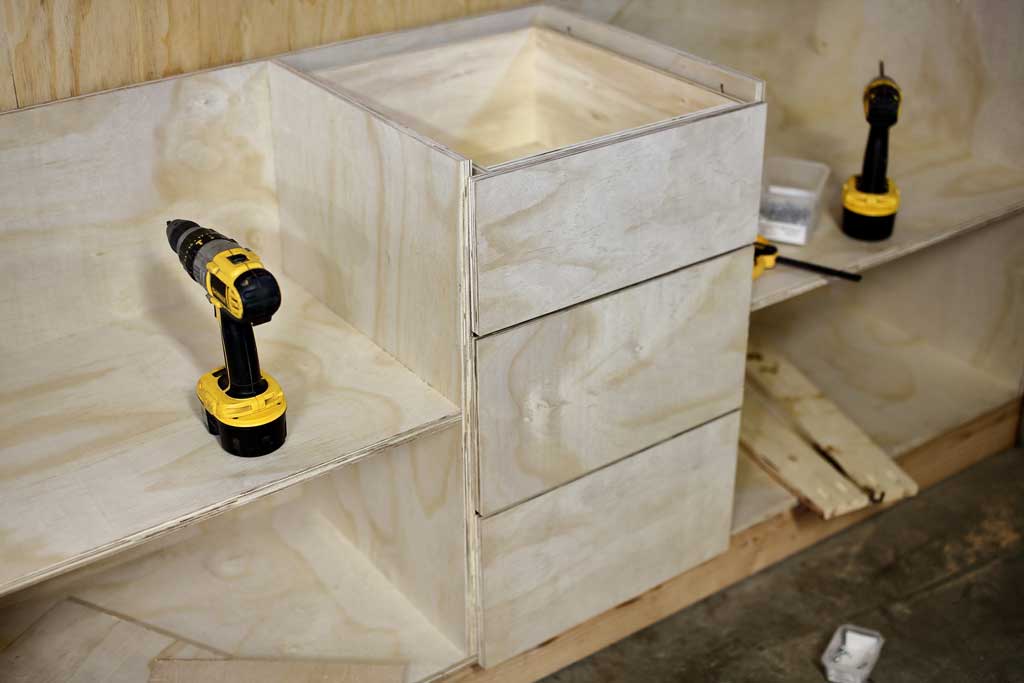
To build the drawers, use 1/2″ plywood for the boxes and 3/4″ plywood for the front cover. Using a Table Saw cut all drawer pieces as shown on the cut list. The drawers are all different heights, but the same width and depth. Once all of the drawer pieces are cut, assemble using Wood Glue and Nail Gun with 1 1/4″ Brad Nails. Then attach the front board using 1″ brad nails from inside of the box. The lower drawer has the cover board that’s 3/4″ larger than the box so make it sit 3/4″ lower on the bottom.
Step 12 – Insert and Attach Drawers to Slides
Place a small 1/4″ plywood piece on the bottom of the cabinet and then place the bottom drawer over the plywood. Extend the drawer slide and screw it in the box. Then remove the 1/4″ plywood from underneath the drawer leaving a 1/4″ gap under the drawer. Then again, place 1/4″ plywood over the lower drawer and install the middle drawer. Install the upper drawer the same way.
Step 13 – Assemble the Top Section of the Garage Cabinet
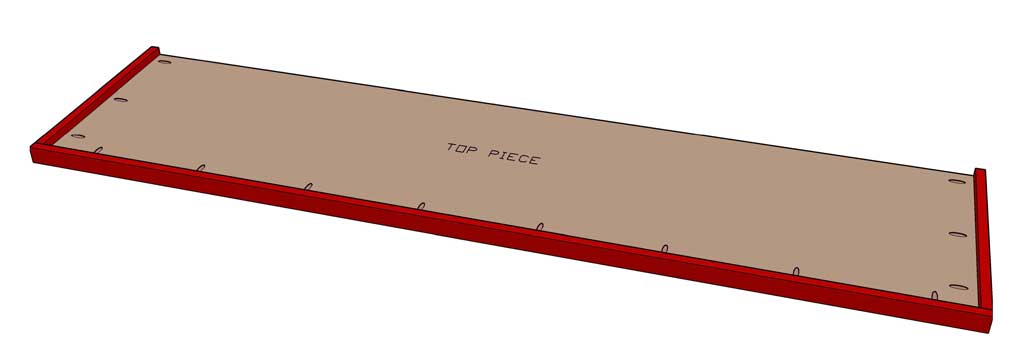
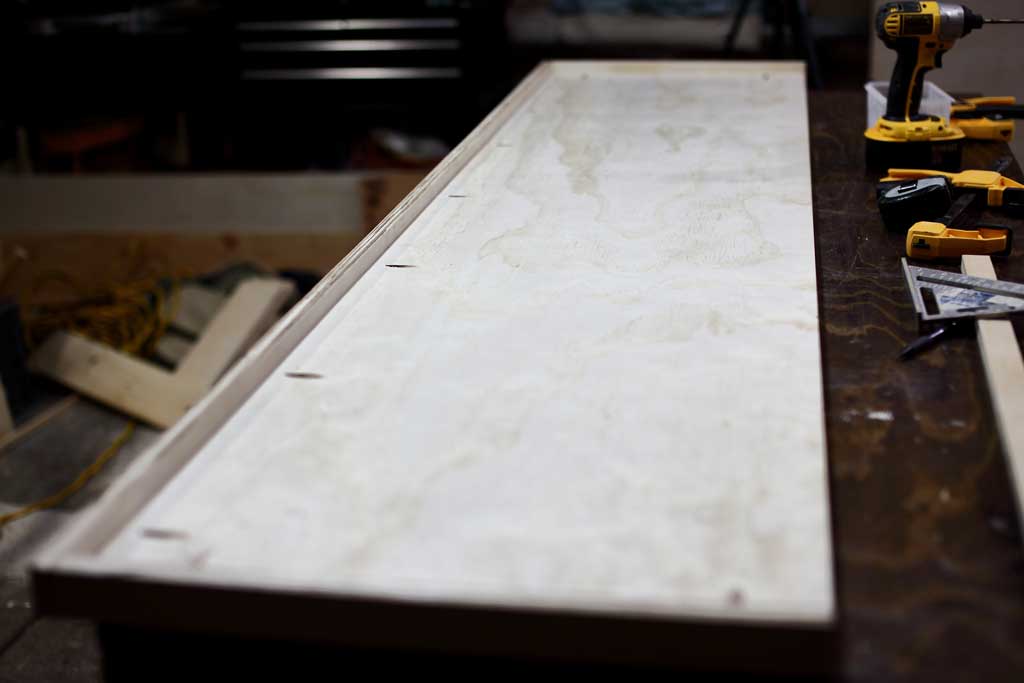
Now the top piece of the cabinet will have a 1 1/2″ high strip on the front and the sides. Take 3/4″ plywood and cut one piece to 1 1/2″ x 79″ and two pieces to 1 1/2″ x 14 1/4″. First, attach the side pieces with 1 1/4″ Pocket hole screws and then attach the front piece. Make sure to clamp the boards to the workbench so that 1 1/2″ strip does not shift when screwing it in. The top section of the cabinet is important to assemble without any caps or misalignments.
Step 14 – Place and Attach Top Section to the Cabinet
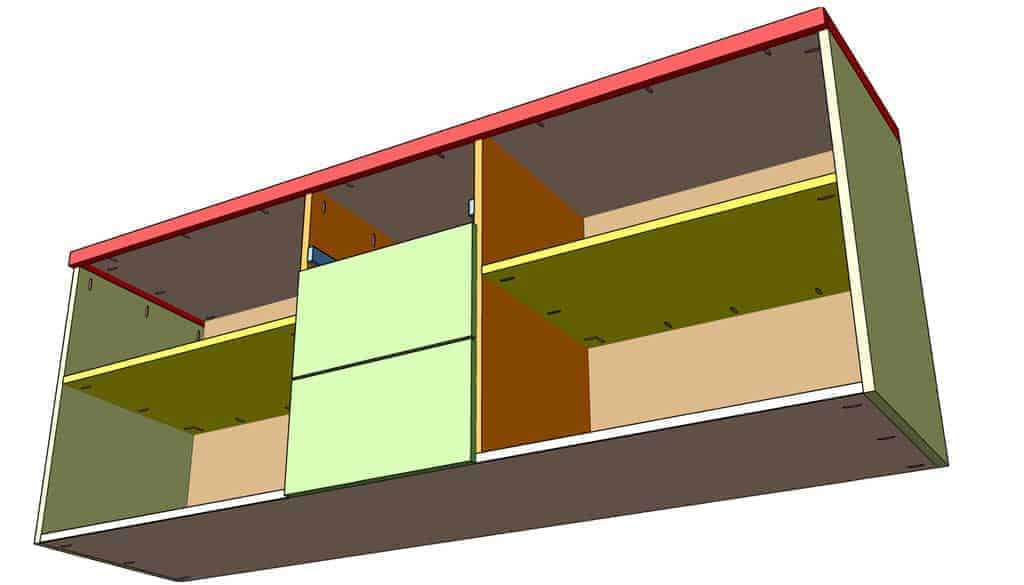
Place the top piece over the cabinet and attach it with 1 1/4″ Pocket hole screws from the inside. Take the upper drawer out to get access to the pocket holes on the middle drawer support boards. Also, screw in the top on the backside of the drawer.
Step 15 – Cut and Install Hinges on the Doors
Cut four doors to 15″ x 28 1/4″ dimension. To install the hinges on the doors, you will need a 1 3/8″ by 3/8″ Shank Forstner Drill Bit and a 7/64″ Self Centering Hinge Drill Bit. Since these cabinets don’t have a frame in the front, use full overlay frameless hinges.
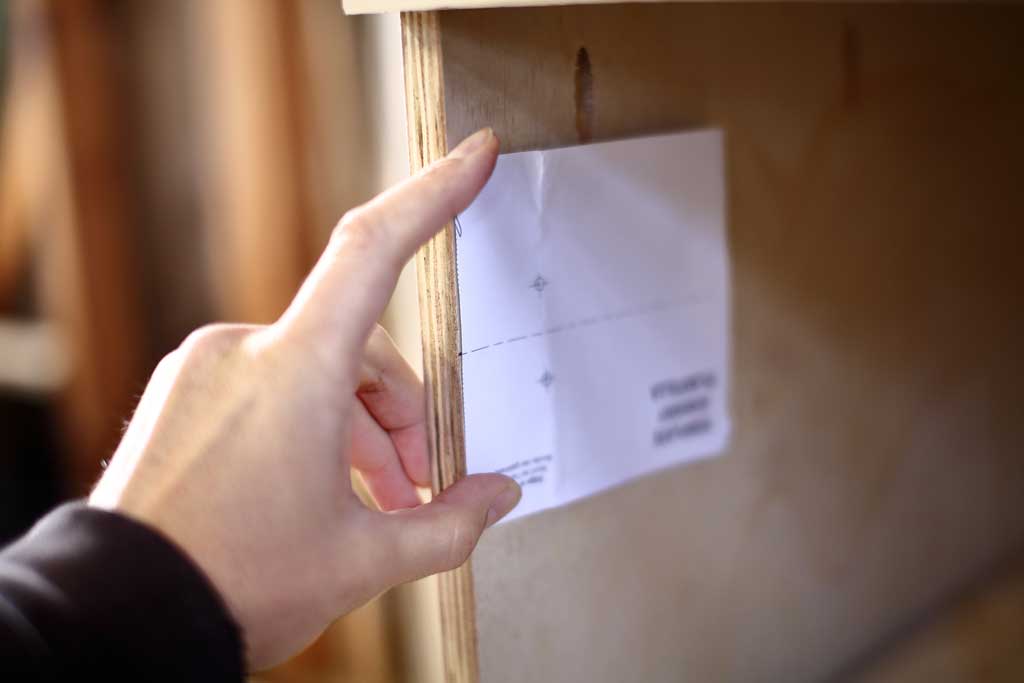
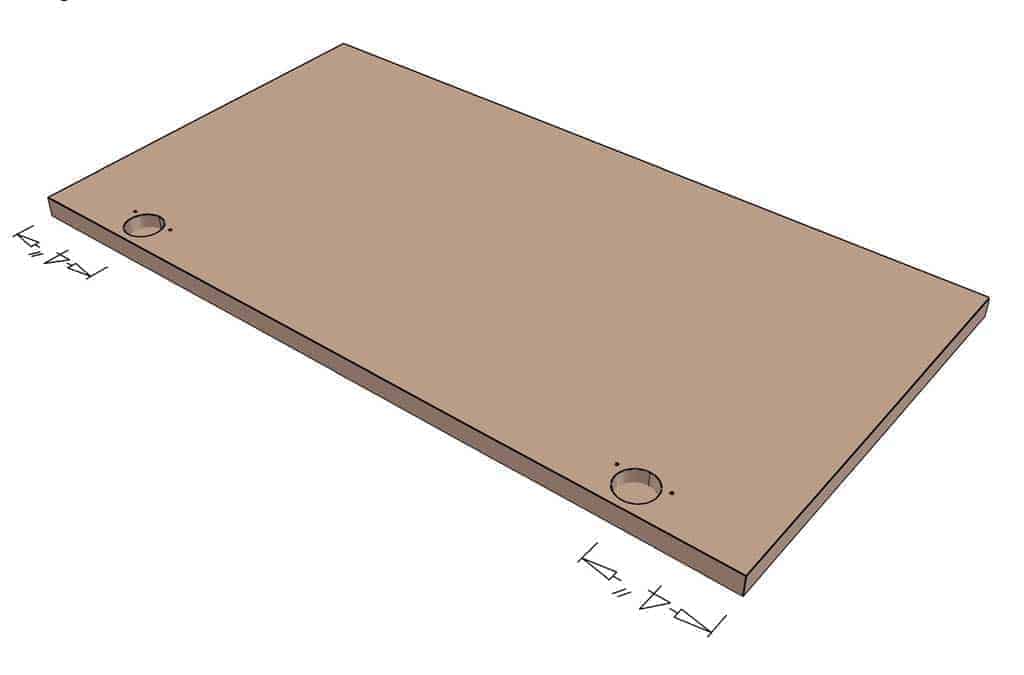
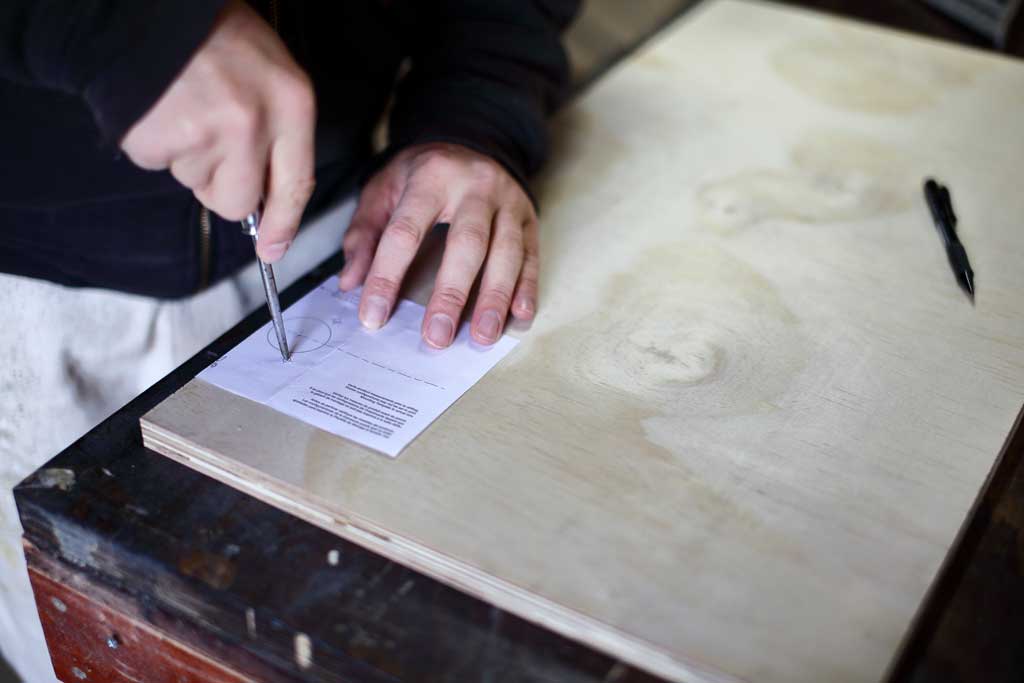
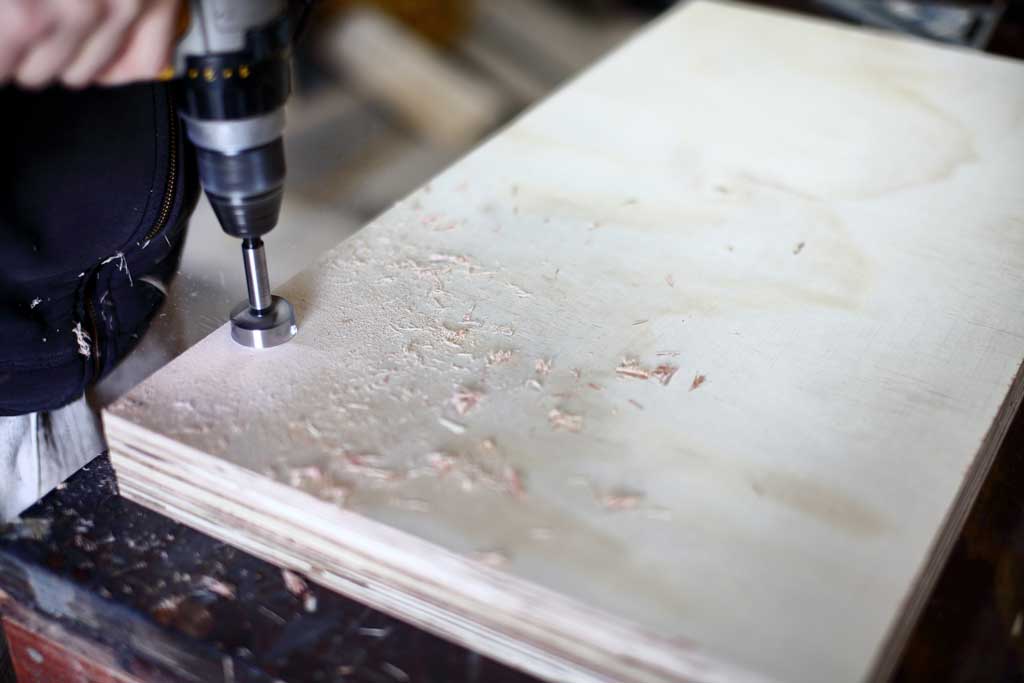
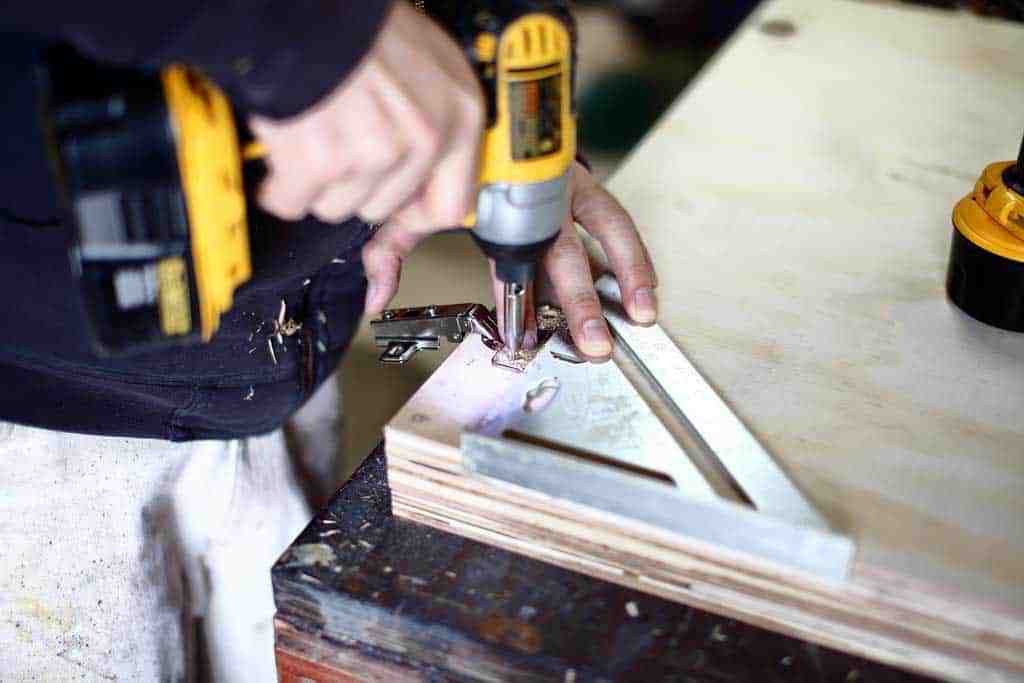
Take the door and measure 4″ from the bottom and 4″ from the top and mark it with a pencil. The hinges you purchase usually come with a template. Place the template at the 4″ mark and using a nail, push down through the template x marks to make a little dent in the door. Remove the template and drill a 1 3/8″ hole at the center of the mark using shank Forstner drill bit. Place the hinge inside the large hole and using a construction square make sure that the hinge is perfectly squared before pre-drilling the holes for the screws. Then pre-drill the screw holes using a self-centering hinge drill bit. Attach the hinge to the door with the screws that came with hinges. Repeat this step to install all hinges on all doors.
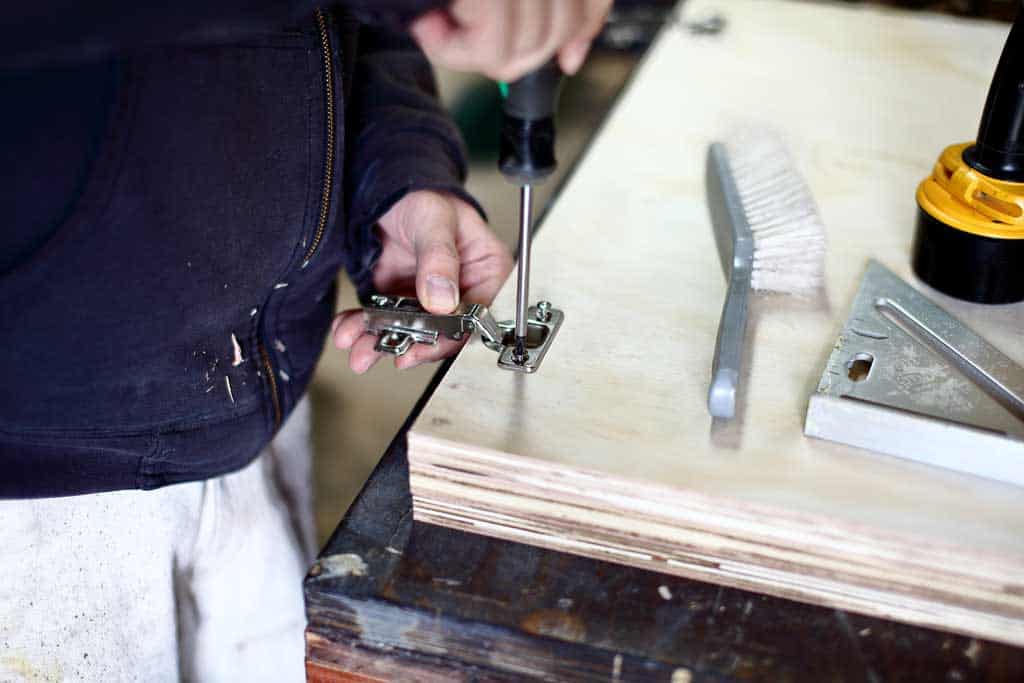
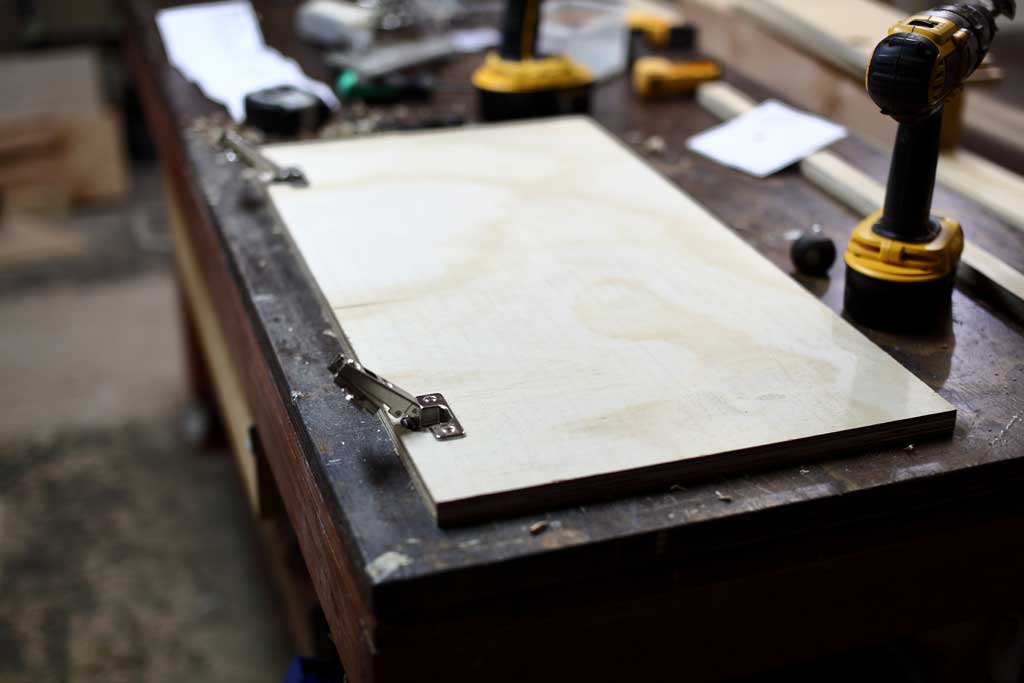
Step 16 – Finish by Attaching Doors to the DIY Garage Cabinets
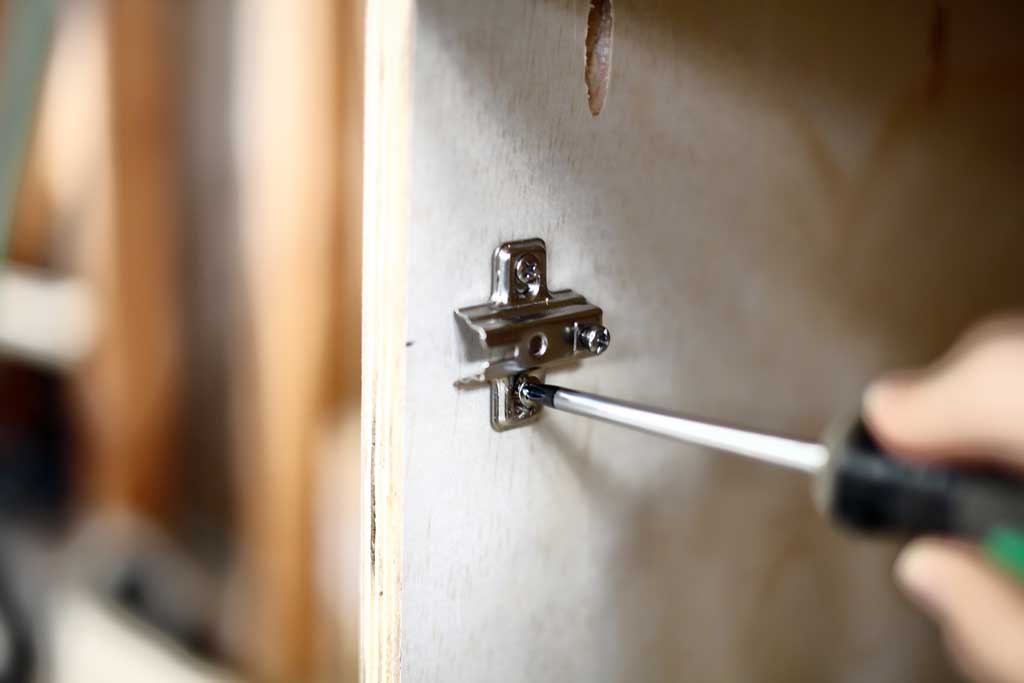
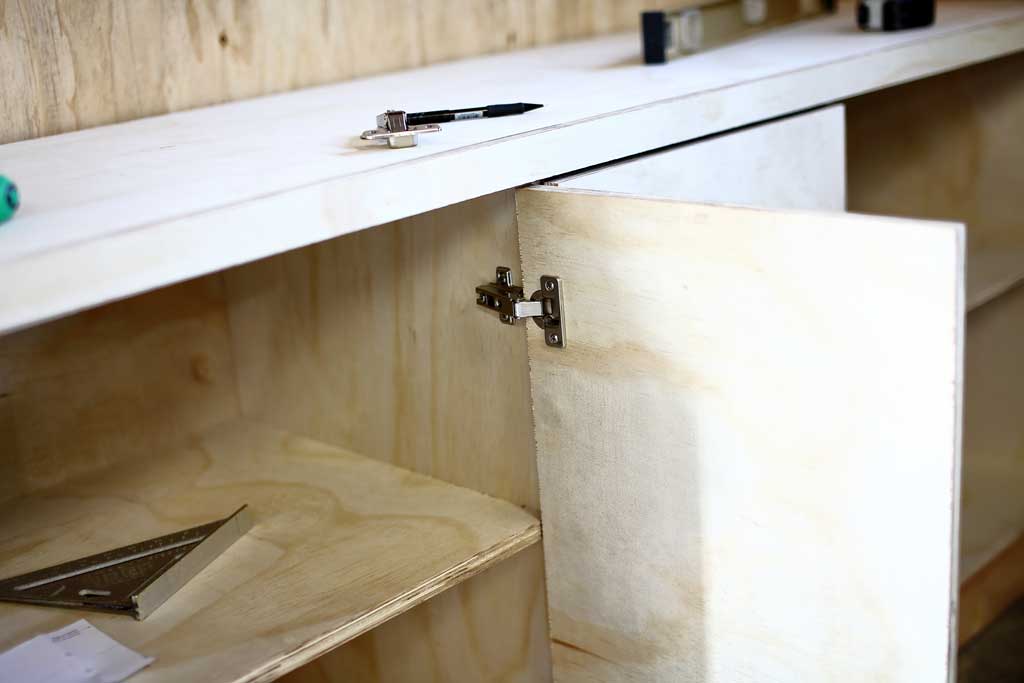
Transfer the 4″ marks from the door to the sideboards of the cabinet. Make sure that these marks match exactly as the door. Place the second template at the mark and with a nail, push down through the template to make a dent on the sideboard. Release the screw that adjusts the door depth and half of the hinge will slide out. Attach this half of the hinge to the sideboard. (It’s easier to screw in a small hinge by itself than to hold the door and attach it in place.) Now insert the door hinge back into the other half and tighten the screws. Do this for all of the doors.
The hinges come with instructions on how to adjust the doors. Adjust the doors to make sure the gaps between the doors and drawers are the same all the way around. Once the doors are installed, take the handles and mark where to drill the holes. Use a scrap piece to pre-drill the holes for the handles to make sure the holes are drill accurately. Then using that as a template clamp it to the door and drill the holes. Using a template makes the handle installation easier. Drill the holes and install the handles. You’re done with this DIY Garage Cabinets.
