A simple and easy way to improve your kitchen space is by installing a faucet. Aside from being great for kids, it is eco-friendly and makes cooking less of a hassle. This guide will explain how in 9 simple steps, you can replace the kitchen faucet in your home.

How Much Does It Cost To Install A Kitchen Faucet
The cost of installing a kitchen faucet is dependent on many factors. The first is the kind of kitchen faucet you wish to install. Depending on the brand and type, prices may vary. The second factor that affects the cost of installation is whether you want to do it yourself or hire a pro. On average, it costs between $175 and $371 to install a kitchen yourself. You will likely cough out an additional $153 to $186 if you wish to hire a professional to carry out the installation for you.
8 Steps Of Kitchen Faucet Installation
1. Installation Preparation
Before installing a new kitchen faucet, examine how many holes your current sink has. A one-hole faucet can function in a two-hole sink, but not vice versa. Next, ensure that you have a torch and shallow pan with old towels ready to catch any water. Protect your eyes from flying debris by wearing safety glasses. Clear out everything under the sink. Turn off any electrical outlets under your sink before removing the old one. Here we’ll teach you how to install a single-handle kitchen sink faucet.
2. Close water supply valves
To stop the water supply, turn the hot and cold water supply valves counterclockwise. If you don’t have stop valves, you’ll need to turn off the entire house’s water. If you’re having trouble doing so, use a rag or pliers to increase your grasp. Close the faucet handles to release any pressure in the lines.
3. Remove water supply lines.
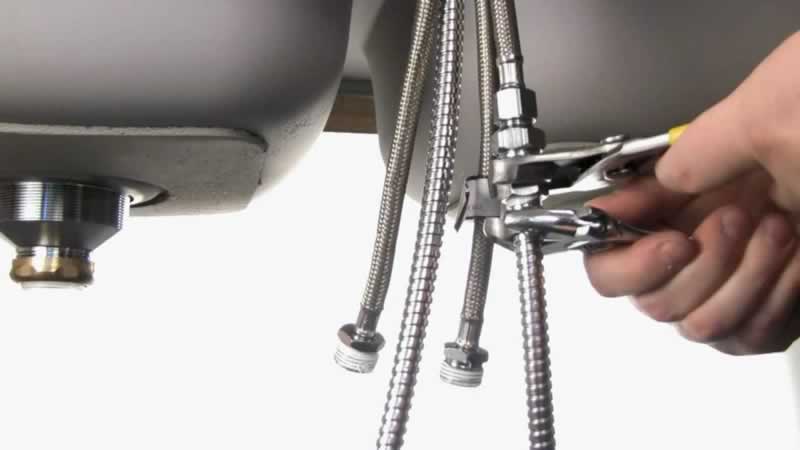
To remove the old faucet, you must first separate the supply lines from the faucet to the hot and cold valves. A threaded nut connects each supply line to its valve. Turn each nut counterclockwise with an adjustable wrench. To avoid damaging the connections behind the cabinets, stabilize the water pipe as you release the supply lines. After disconnecting one side’s water supply line, do the same on the other. If the valve drips even when the handle is off, it’s malfunctioning. To replace it, turn off the water that runs in the house.
4. Disconnect Faucets
Before you can remove your faucet, you must disconnect the old supply line. The two water supply lines are directly linked to the hot and cold valves. Because the faucet mounting bolts are installed first, you must undo the supply line connections before removing them.

5. Removing The Old Faucet
The previous faucet will be mounted to the cabinet’s underside. A single shank holds the hot and cold supply lines for a single-handle kitchen faucet. These can be found on the hot and cold valve bodies of a two-handle centerset faucet. To remove the faucet, you must first remove the mounting hardware. In case of rusty bolts or mounting hardware, use a penetrating oil like PB Blaster to loosen. Allow it to sink in. More than one application of the oil may be needed. The faucet should lift free of the mounting hardware. To break a caulk seal, apply pressure. Before installing your new faucet, clean the area around the sink using an approved cleanser.
6. Replace Faucet
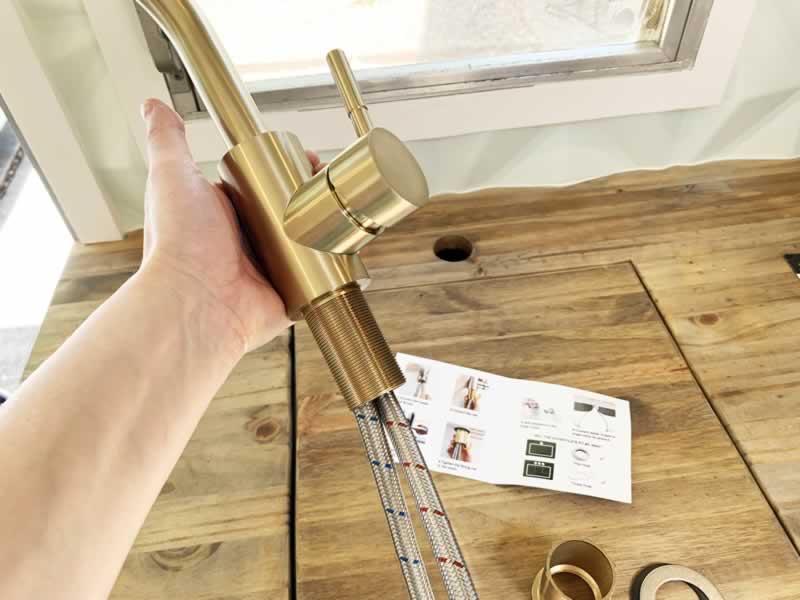
In a single handle, centerset faucet with an escutcheon plate, the hot and cold supply lines are integrated within the faucet, as is a diverter for a side sprayer. Follow the manufacturer’s directions for installing your new faucet. The escutcheon plate is not used in one-hole installations. If you wish to use this configuration, your faucet should come with separate components. In a three-hole arrangement, the escutcheon hides the two outside holes. Incorporate a gasket between the escutcheon and the countertop.
The spout assembly of a single-handle faucet has hot and cold valves. In many circumstances, it will also have flexible supply connections. Some faucets come with state-of-the-art supply lines called PEX tubing built into the hot and cold valves. The built-in supply lines for your single-handle faucet will be labeled hot and cold; connect them to the respective water supply valves. Other faucets have threaded hot and cold valves, so you’ll need to supply your flexible supply lines. The faucet usually has a 1/2 inch male connector. Before mounting, place Teflon tape on the threads.
7. Anchor Hot/Cold Valves
The mounting hardware for single-handle faucets usually attaches underneath the deck. This item has a washer against the countertop and a mounting nut with three screws. Other faucets have various mounting hardware, and some include extra for thin decks. Slide the gasket over the supply lines and the shank of the faucet, situating it on the mounting surface. The escutcheon should cover holes 1 and 3. Screw the nut up to a half-inch below the surface of the sink. Tighten the mounting screws evenly until the faucet assembly is flush with the cabinet’s underside. Before tightening everything entirely, check sure the faucet is adequately aligned beneath the sink.
8. Connect Water and Flush Lines
Connect the supply lines to the water supply valves. Most homes have a 3/8-inch fitting. Then:
1. Wrap each valve’s threads in Teflon tape clockwise. Hand-tighten each nut with an adjustable wrench.
2. Ensure you secure the water supply valve pipe into the wall to avoid damaging any connections. Reconnect the water supply lines and reopen the hot and cold valves. Check your faucet and sprayer’s functionality. Then check for leaks. Then tighten the connections with a wrench until the leak stops but do not overtighten.
3. After installing your new faucet, flush it to clear out any debris that may have gathered in the lines.
4. Remove the aerator from the faucet shaft. Your faucet may come with a tool for this, or you can do it by hand.
5. Remove the aerator and crank the handle full blast for about a minute.
6. Replace the aerator and turn off the water.
Conclusion
There you have it, our guide to kitchen faucet installation. Whenever you wish to change your faucet, always remember that there are different features. One example is the pull-down faucet that is perfect for keeping the sink and dishes clean. Irrespective of your choice, the guide above will help you complete your installation in no time.


Add comment